
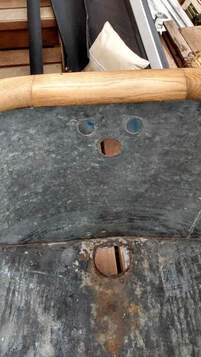
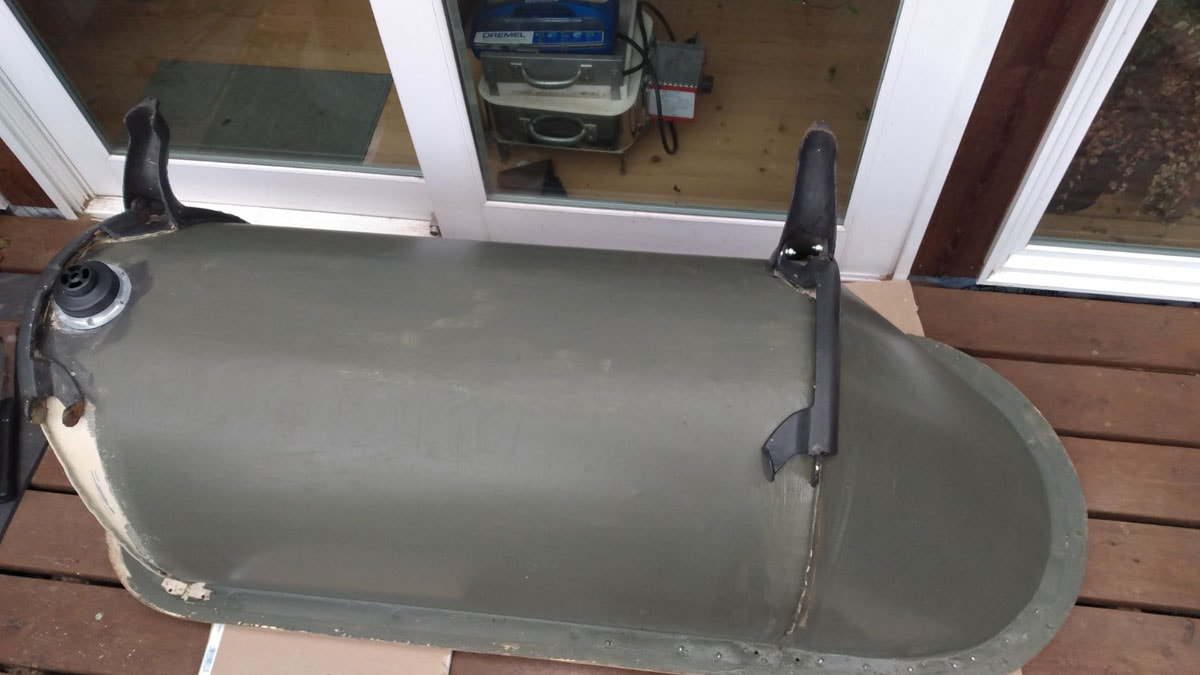
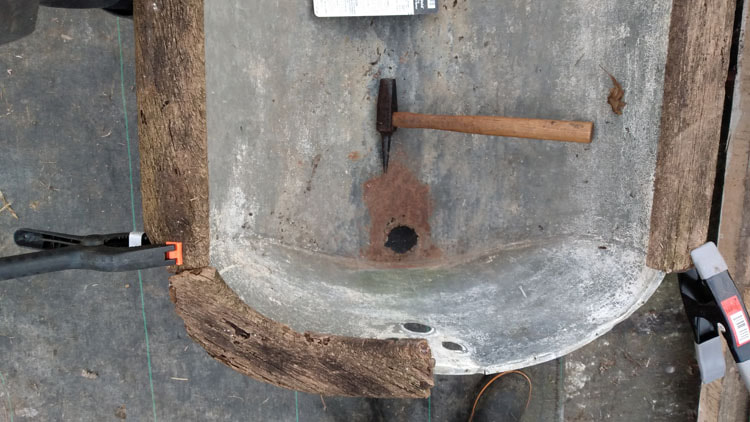
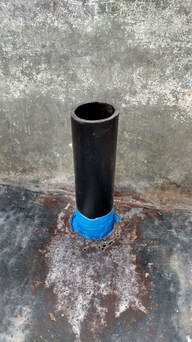
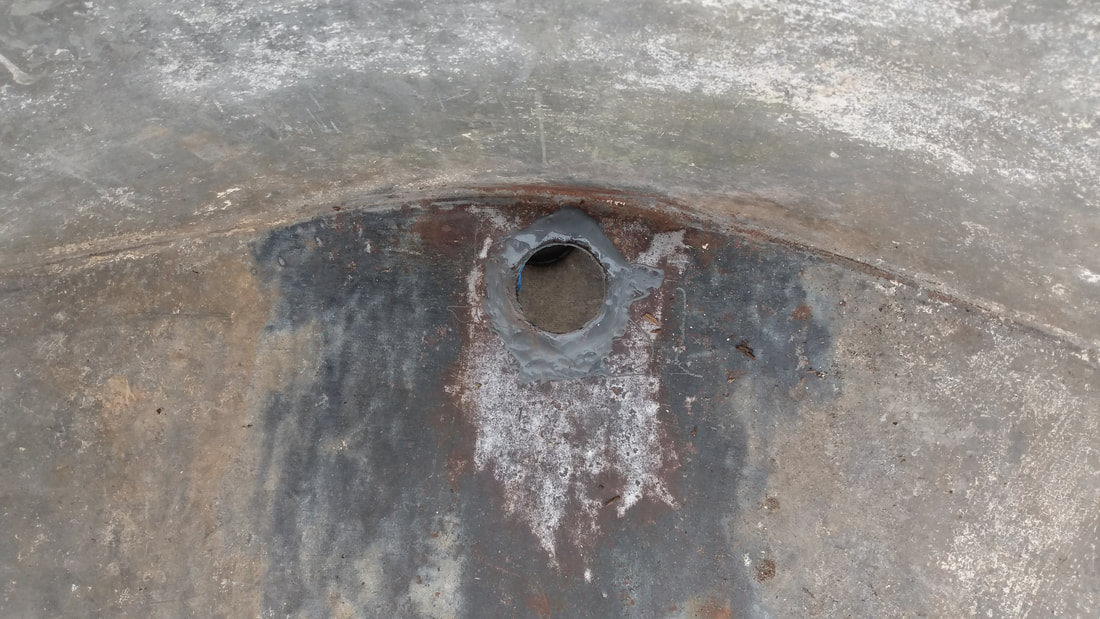
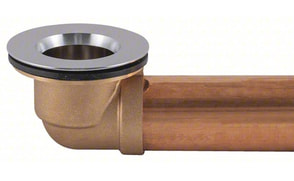
 ANOTHER TUB!? So it seems I am into these 1800's vintage cowgirl tubs! In previous post I began to journal the procedures we used to restore a friend's tub. We are still working on that one. In the meatime I needed to finish my bathroom to actually have a shower after 13 YEARS! Yes I do not exagerate. These tubs usually have rusted out spots, especially the drain. I used JB Weld, the one that's heat resistant on the last tub. This one had a bigger hole....see below. I solved it by making it uniform with JB weld around a big pipe with blue tape on it to prevent sticking. Then instead of a clawfoot drain piece I put in a sink sized one...See pic on right below....NOTE: when I used the jb weld I had to layer. I wanted the tub to be flat where drain went in and unlike regualr porcelain modern tubs there is no divet where you put plumbers putty. So I applied jb weld and sanded layers to make it flat since tub is a bit concave in general.
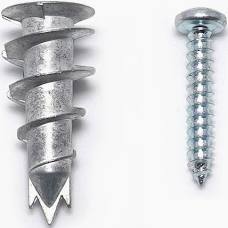
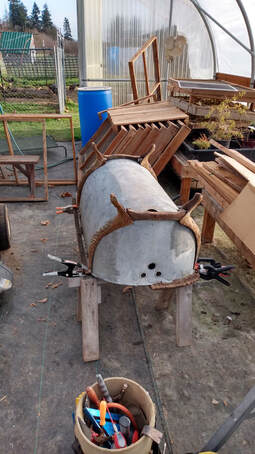
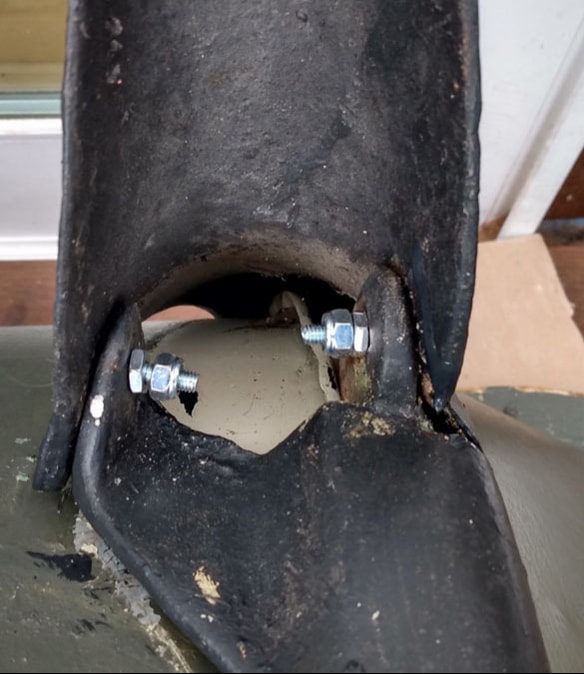
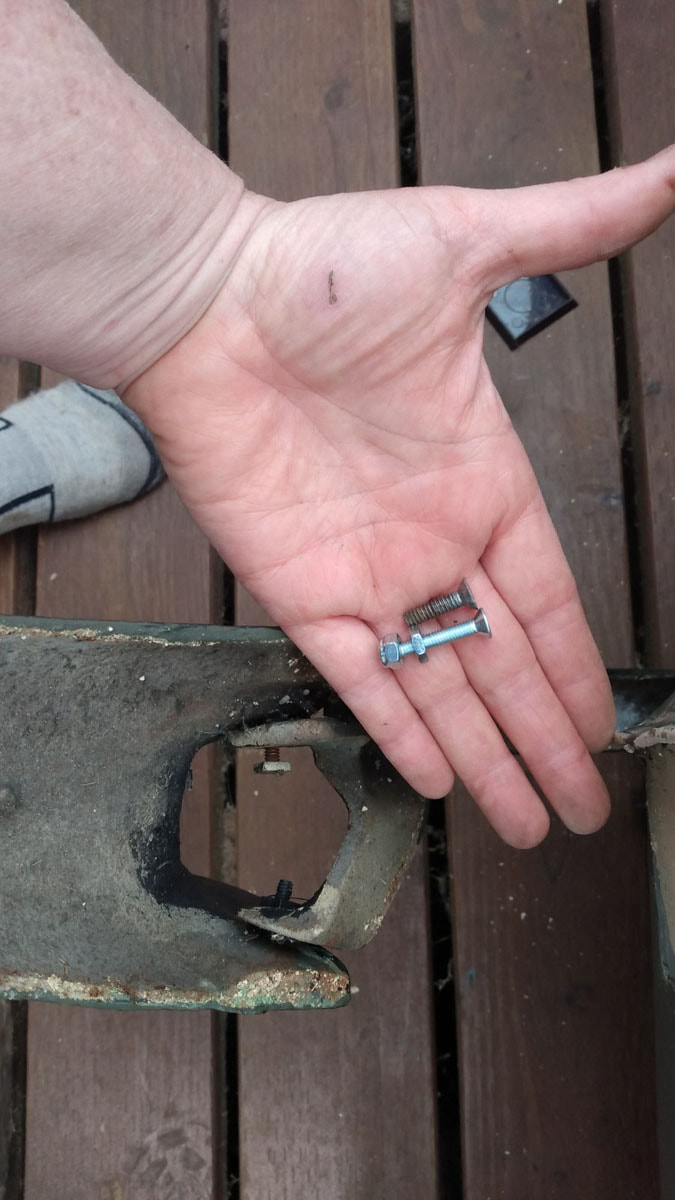
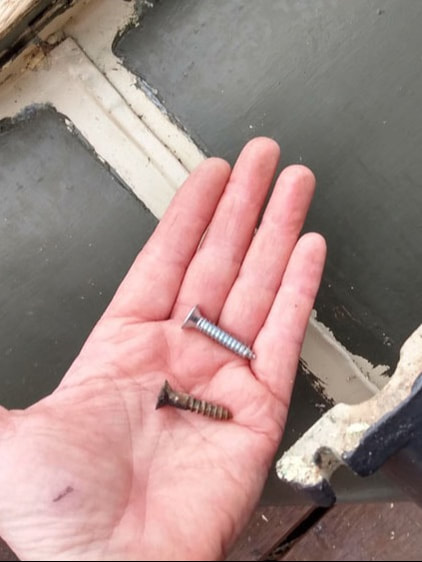
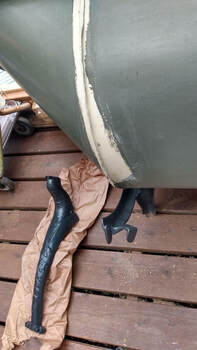
ONTO THE LEGS These old tubs have fabulous legs. They go up the side and bottom to make tin much stronger in its shape. There are two screws holding top of side legs to the wood rim. Also there are four bolts on front and back sets of legs, 'hinging' them together. Originally after stripping tub and so much other work going on, I got lazy and just painted the tub. But when I was working on drain a screw fell off. I realized the rusted old scres and bolts had to go. 1. Screws holding legs to wood rim: I matched the old slot heads to modern ones but added some length, see top right. 2.Bolts hinging three part leg assemblies together: I bought new ones and added lock nuts since old ones kept getting loose with only one nut.See above pic in middle and below where new bolts are in. 3. Self Tap 1/2 screws rim to metal flange; The metal flange was ripley and funky. So I added these little screws every 3-4 inches to make it need under rim. I painted the screws to fade away near the grey green paint. you can see these in second row of pics above where tubs underbelly is exposed.
 BATHROOM DONE! TUB LOOKS GREAT!
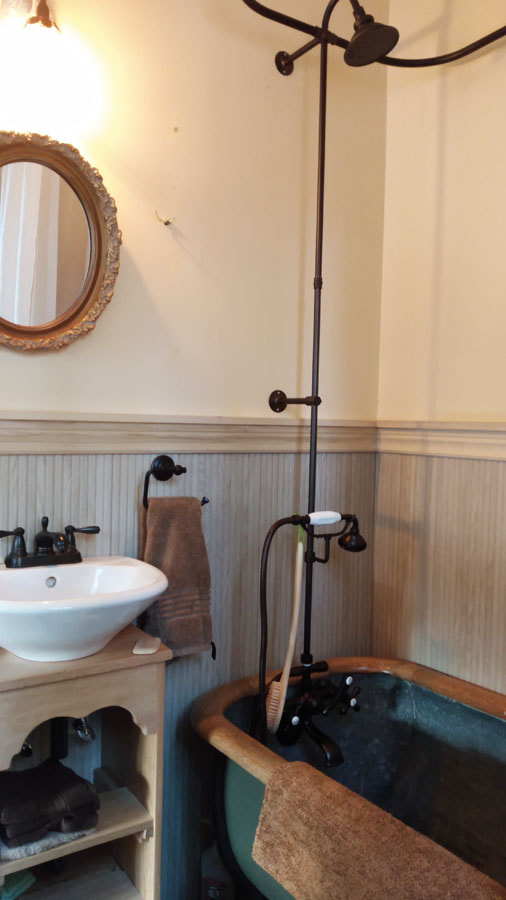
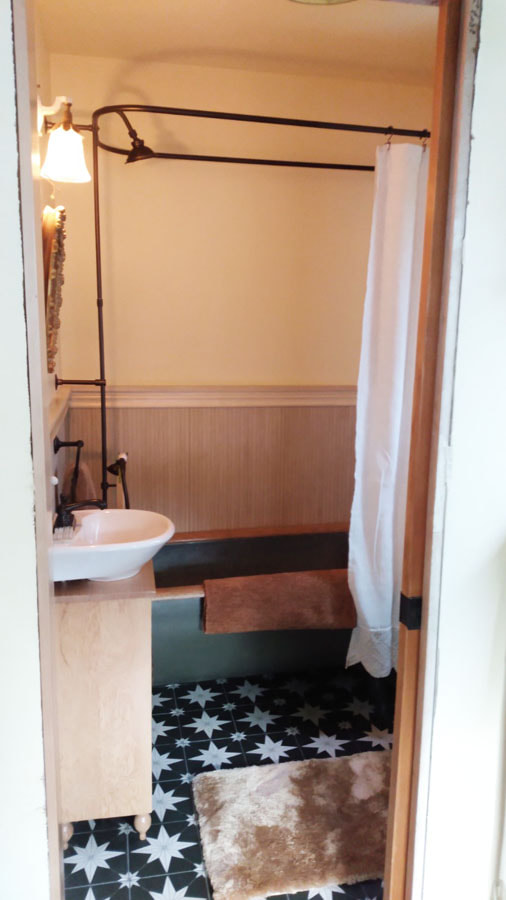
WOW! Check it out. The tub is so comfortable (just like my friend Kelly said it would be!). It has a very sloped back so you can really lie down in it. It's deep and though narrower than a standard tub (26" instead of 32 inside) it feels cozy. I am nervous to stand up on thin steel bottom but it seems strong. I might add a shim style cedar part under tub to support if it feels like it might dent. REST OF MY TUB'S BATHROOM SETUP I installed vintage style tile from Lowes for floor, The 'maple' wood look tile walls look like wainscoating but waterproof. I put in a new pedestal for sink, removing the porcelain one. This pedestal is a handmade hemlock cabinet for more storage in my tiny bathroom. There is popular trim on top of wainscoat tiles to make it more woodsy. And though the woods don't match all the wood looks nice next to the handmade wood compost tiolet (see previous blog entry). Though I have one small leak hard to get too (clawfoot faucet elbow was cheap and compression washer wont set right) the tub is in. I took a bath! NOTE: These tubs are not standard sizes, many companies made them so they are all sizes. My tub is about 66 inches long and 27" wide, but the faucet assembly I bought is a big. I love it, but you should consider the smaller types. MOLLY BOLTS: When I put in shower ring I used the molly bolts to left. BIG difference than ones that come from kit. These go in simple and hold like 50lbs a piece. Ring is still wobbly so might add a few more supports.
0 Comments
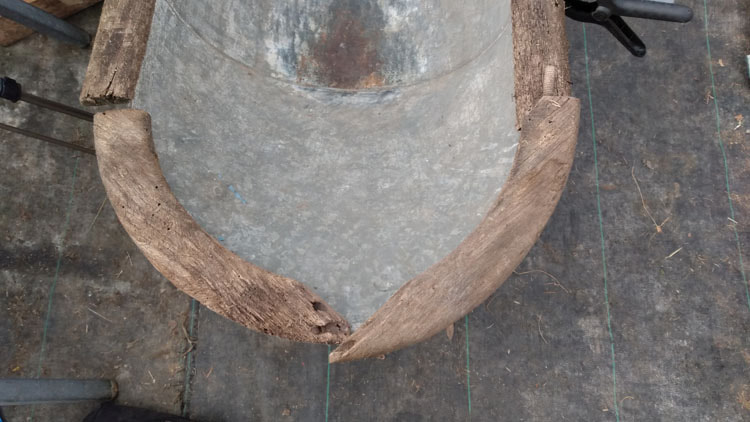
 This isn't necessarily an off grid story but if you like old Cowgirl/boy tubs check it out!! I thought it would be fun to record the way my friend Kelly and I repaired an old 1800's tub with wood rim. I had bought it years ago at Aurora Mills in Oregon for $180.00**. These old tubs cost a fortune online and need extensive repair in most cases. Rotted wood rims and rusted spots around drain are the worst culprits. I found nothing online that could help us figure this out. However Kelly already has one of these restored in her house. So we had some luck figuring out how to proceed by examining hers. I personally liked these tubs because they are pretty, rustic, lightweight and can fit in tight spaces....Mine is only 26 inches wide and fit in my 24 inch door to a tiny bathroom. Galvanized metal is not toxic according to info on web. But zinc from galvanized metal can be toxic in large amounts. There is no indication that galvanized tubs release a lot of zinc....Anyways they are very comfortable and can be wonderful in a rustic cabin. ** I found one of these old tubs in a nearby antique shop that was in excellent shape and needed no drain or wood rim repair. I installed it and left the Aurora Mills tub outside until I figured out what to do with it. Luckily I stored the metal legs and old wood parts in a closed bin. This protected them well. 1. Attaching legs: If you are on this same journey you might find attaching the legs a bit tricky too. Because old bolts were rusted we bought stainless steel bolts to match the old ones - with flat heads. Kelly bought washers nuts and wingnuts as well. The legs seem to be attached with these bolts and once screwed to wood rim hold themselves in place with tension. There are many brands of these old tubs and many have totally different legs, cross braces and parts. So they dont always fit if you have to find parts. NOTE: you may want to clean and paint your tub or legs....in both kelly and my tubs they are left mostly to look as they came. Just cleaned up a little with new plumbing and such. 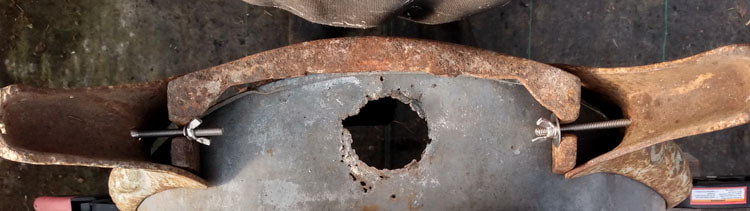 2. Refitting wood rim parts-if you have them!! After attaching legs with new bolts, we clamped old wood to leg tops so we could flip tub over to work on rim. We positioned the wood parts to see how they fit. I then carefully bent the edges of galvanized metal to lay flat again where wood had fallen off. Only two pieces (sides) were still attached. There were tiny galvanized nails, but beware...dont pull on them. Kelly used a thin rotary cutter to slip between metal and nail to cut. This kept the thin metal rim intact and unbent for most part.
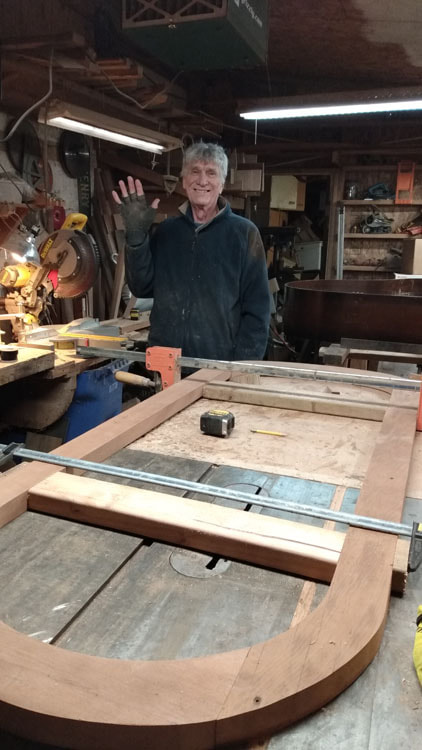
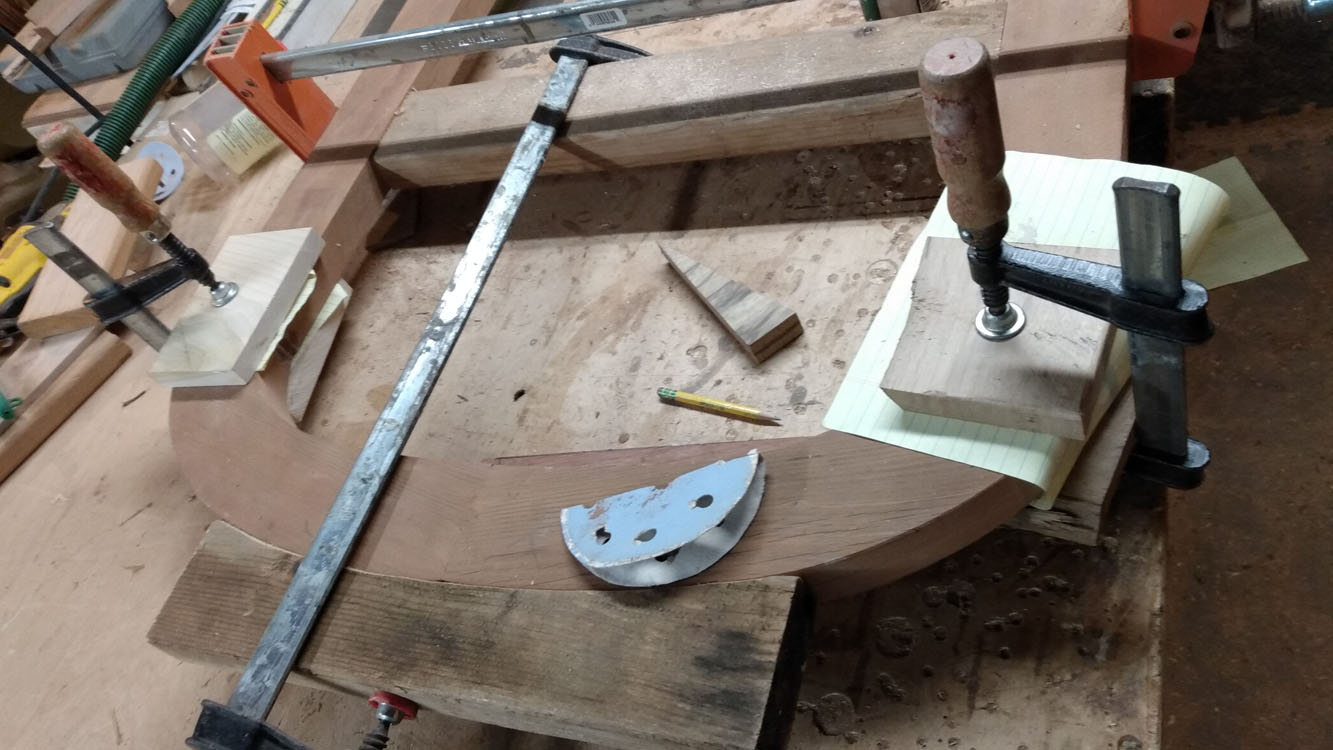
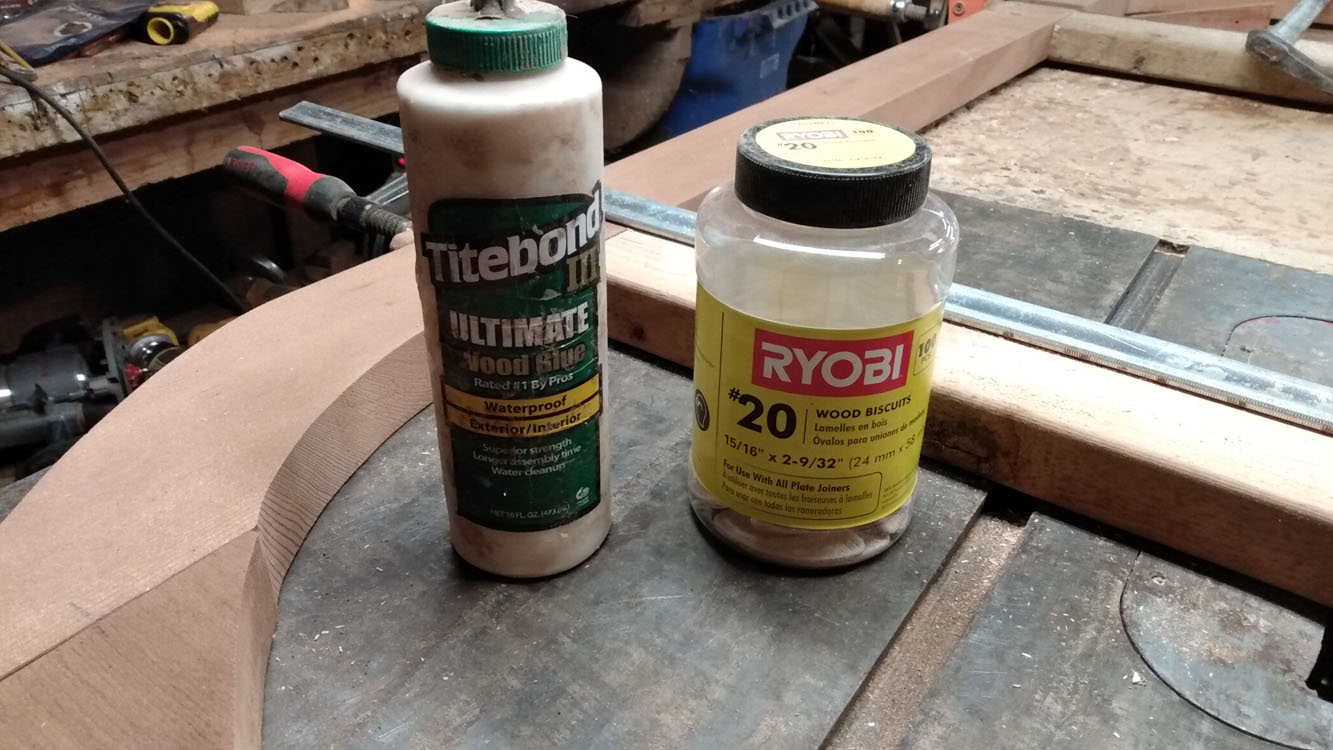
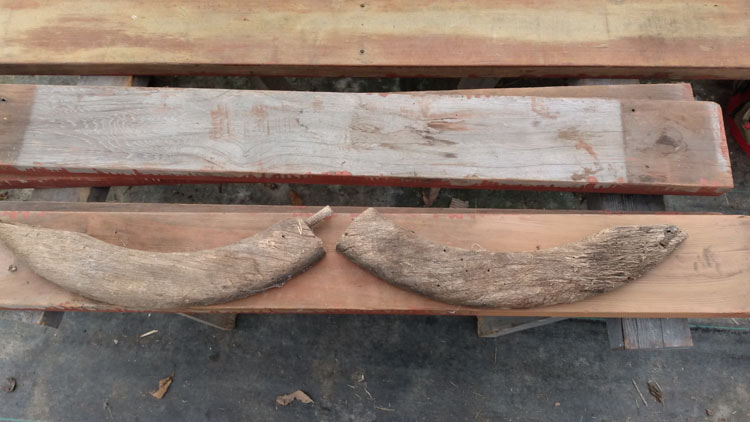 3. Replacing old wood rim: I began to layout some 2x6 Redwood pieces for replacement wood rim parts. Its a bit thicker than the 1" old rims but Kelly liked the idea of trying something new and had these on hand. We plan to cut shapes to fit, biscuit join parts (the dowels are big -as seen above-and one has to be precise to make that way in new wood rim). 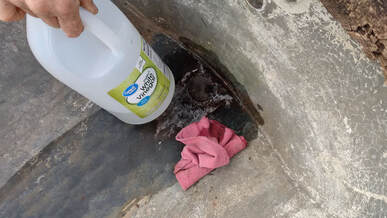 4. DRAIN REPAIR: Next we took a break from the wood rim to prepare the area around drain. We sanded the old rust off and then cleaned the area with vinegar. Afterwards we rinsed it and used a torch to dry it, careful not to heat too much (you could just wait for it to dry). BELOW: two products we bought to try. We used the jb weld epoxy not the fiberglass. (though if your tub needed more extensive hole repair, the fiberglass kit might give stability to the backside. The JB epoxy we used says it can go up to 250 degrees and is water proof. JB has other products too "Extreme heat" for mufflers and such. We could not find this at our local Lowes so chose the one below. So you decide what to use. 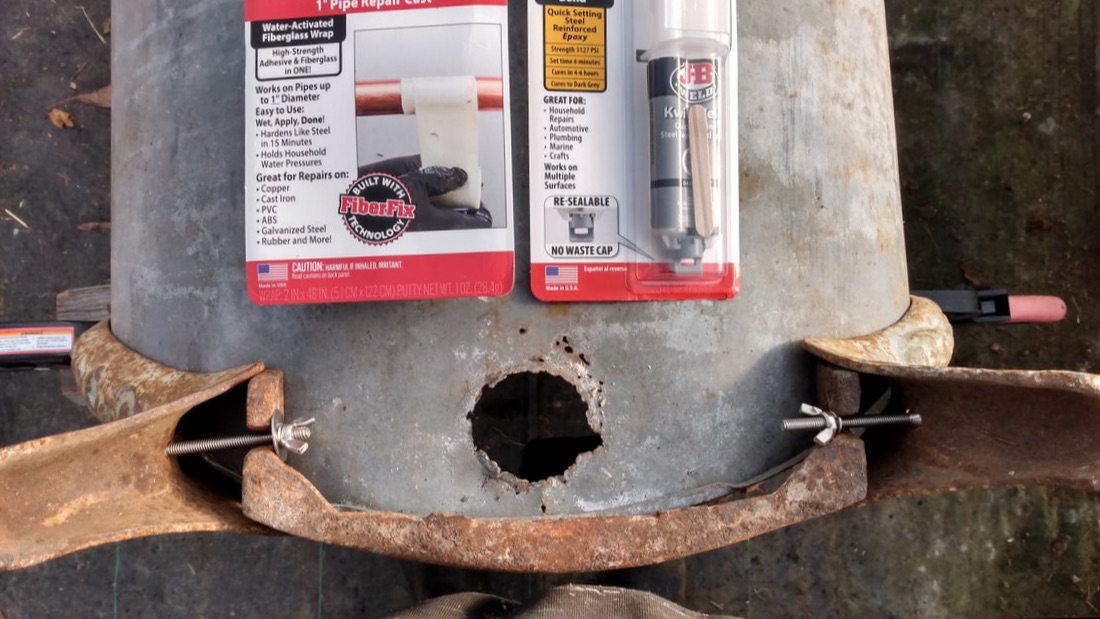 5. Preparing to epoxy drain hole: After cleaning the area, we measured out the size we needed to make drain hole. you can see it has pit marks and is larger than drain part. Below is a picture of a brass drain part with shoe similar to our drain part. **You need a threaded drain extension for these old tubs that have that collar part between legs. This collar raises the distance so a straight run like picture below does not fit over rim.
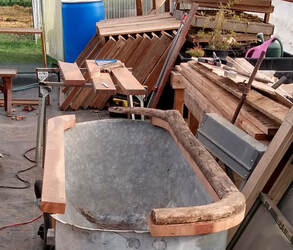 6. BACK TO RIM: So I am sure there are many ways to figure this out....especially if you don't have the original wood from tub or its very rotted like in this case. First we set up the old wood rim onto tub as best we could. We clamped it to tub and laid it out according to the two pieces still attached. NOTICE: Standard tubs used full one inch hardwood doweled together. We used 2x redwood and are planning to biscuit join it instead. There was a total of two straight side pieces, two top curved pieces and 2 back curved pieces. To determine the new cut pieces of wood make sure to measure everything laid out in old wood setup. ...in this case it was 27 3/4 outside edge to outside. Also measure the old wood lip overhanging inside tub. In this tub it was about 1" all way around but top rim was more like 3/4+. I found these two measurements especially important to laying out new wood. But measure everything you can!! I laid out our redwood lumber onto sawhorses to make the new set of rim pieces. 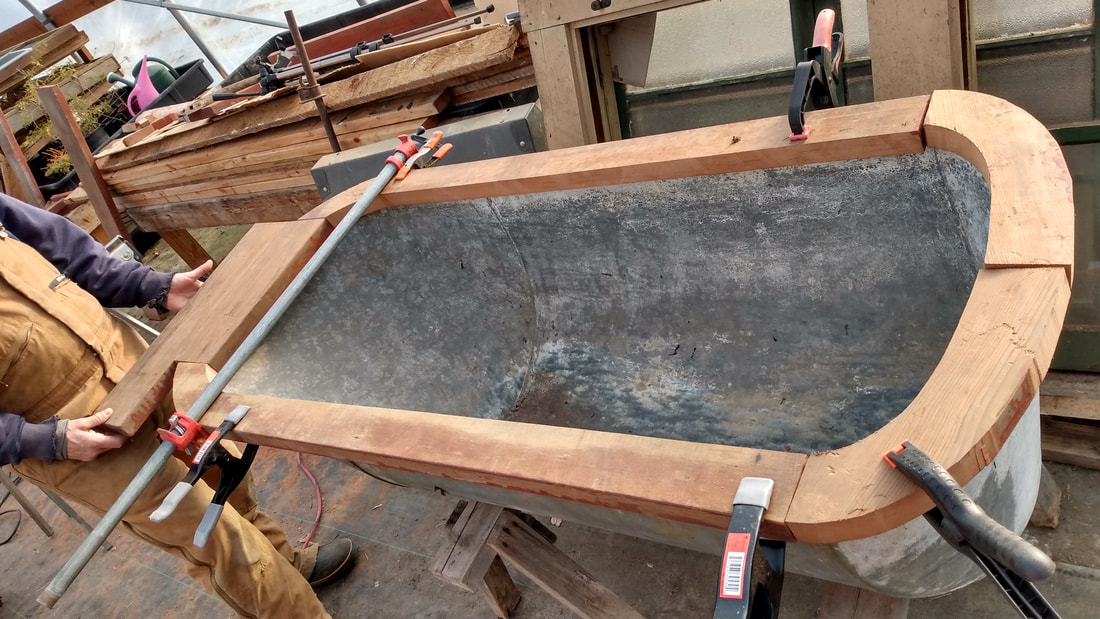 Because the TOP two curved pieces from old wood were cut from a 1x8 to form the sharp curve and all we had was our 6 inch boards....we added some of that length to the side pieces....see below. I cut these first. Then we did something fancy with final top curve piece. We laminated two 2x6 together and cut our shortened single curve piece together. I used a jigsaw with new blades on curves and my worm drive on long lengths. Cut top piece not shown yet.... 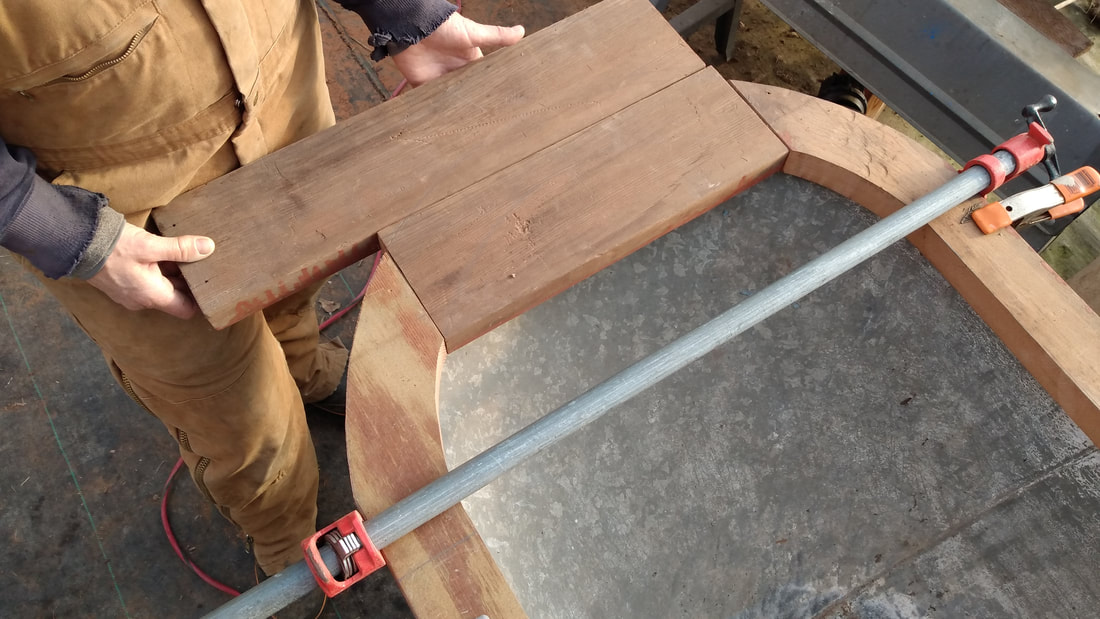 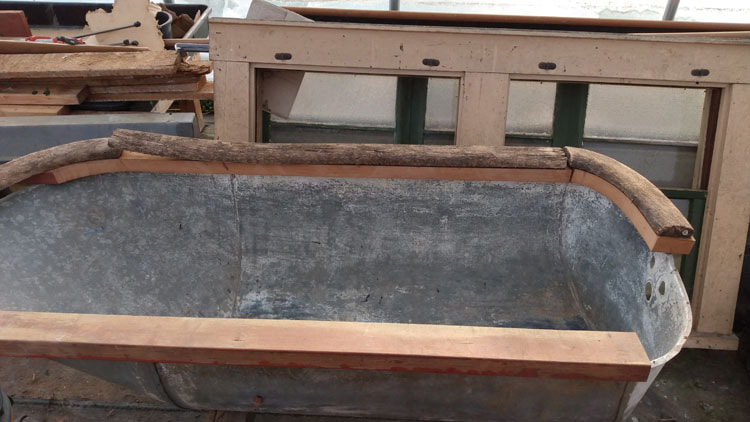 See the old warped rotted pieces laid out on new redwood to double check everything. BE SURE TO CUT THE EDGES YOU ARE TO JOIN VERY CAREFULLY. you want a tight fit for joining. More pics and desciption to come next week.....
Predators: We love them and we fear them right? In my area mountain lions used to be seen now and then. I was never afraid of them and loved to see them in their natural environment. We have many deer back in the woods here and they kept the lions well fed. But when a pair of young lions were spotted a few years ago walking down a main road, folks posted them on Facebook. This alerted hunters and led to all the lions in our area being hunted down and killed. Now we see more black bears, bobcats, hawks, eagles, coyotes and other predators. They fill in when lions are gone. At my homestead it's the three above that have been stalking about where they shouldn't be. HAWK: A Cooper hawk flew right into my chicken run this year killing my brave rooster. She flew in the wide open door so I know that a smaller door for entry and exit would protect my free ranging chickens and duck. I also use an inner door for the attached coop area so if a predator does get into run at dusk (like hawks seem to do) then chickens can run into their inner sanctum. ALSO: bring in your chickens before dusk. Hawks seem to like this time, and seemed to have figured out that chicken head home in a group, thus easier to pluck out and kill. Train your birds to come with best treats and a noise to associate with. I say high pitched ' chick chick chick 'noise and use bread. BEAR: Last year a local bear became a nuisance. She had lived in the woods nearby but was rarely seen. She began to climb on decks with birdseed, knock down garbage cans and invite herself to my bbq with friends. Some folks thought this was ‘cute’ and other neighbors just kept putting food into the cans. But we still managed to find solutions. One brilliant neighbor placed apple cider vinegar soaked towels on only one of the 6 cans. It worked like a charm and she never raided them again. Bears are very sensitive to smell. I used a thin line of bleach around my property (I know this sounds bad!) but it worked well. I had found a bear nest near my coop and was pretty worried for the bear actually. A few years ago I lived nearby but in a different place, a bear tore my coop wall off and in general was a nuisance to all folks with chickens in the area. Once they become this kind of nuisance it becomes more dangerous for the bear as well as the humans! it becomes a much bigger matter and bear had to be removed. SO fast action is important for BEARS: REMOVE all food from composters, garbage cans and your extra grains in coop….just for a few weeks until bears can use other food sources that are coming on in nature. DETRACT with bad smelling things like apple cider vinegar USE loud banging not a loud voice (this seemed to make my bear come closer faster!!!) like a pan and soon. P.S. one of the things I never knew: after finding a dead newborn fawn and her mom eaten, that black bears are big killers of fawns, especially in that time of leaving hibernation, may and June. But the bear we had seemed less hungry after she ate a baby and its mother, so I think it helped lessen with human-bear interactions. BOBCATS: I see bobcats in the day lately. It's a new batch of less- scared -of human- cats. The best method I found was to run after them making very loud noises. I hissed and clucked in bizarre ways I could mimic later. It scared them bad and they never came back (tried on two different ones). And in conclusion These were my best tools so far: SMELLS: apple cider vinegar, bleach. And I will add that urine from my urine diverting toilets, urine from neighbors dogs coming to visit seems to help as well. NOISES: Dont hesitate to make loud unpleasant noises one smaller predators PREDATOR LIGHTS: I use predator lights like these for ten years. I believe they work. It’s only in last two years that I get more predator action. SO I am replacing the worn out solar predator lights.  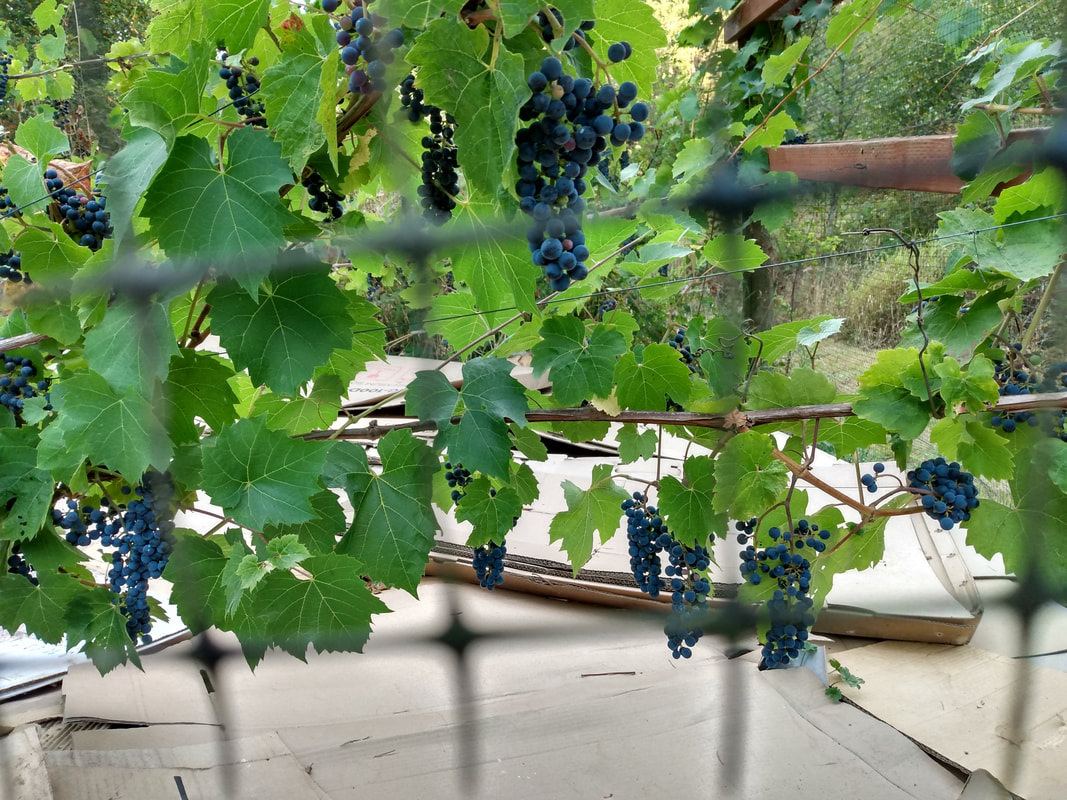
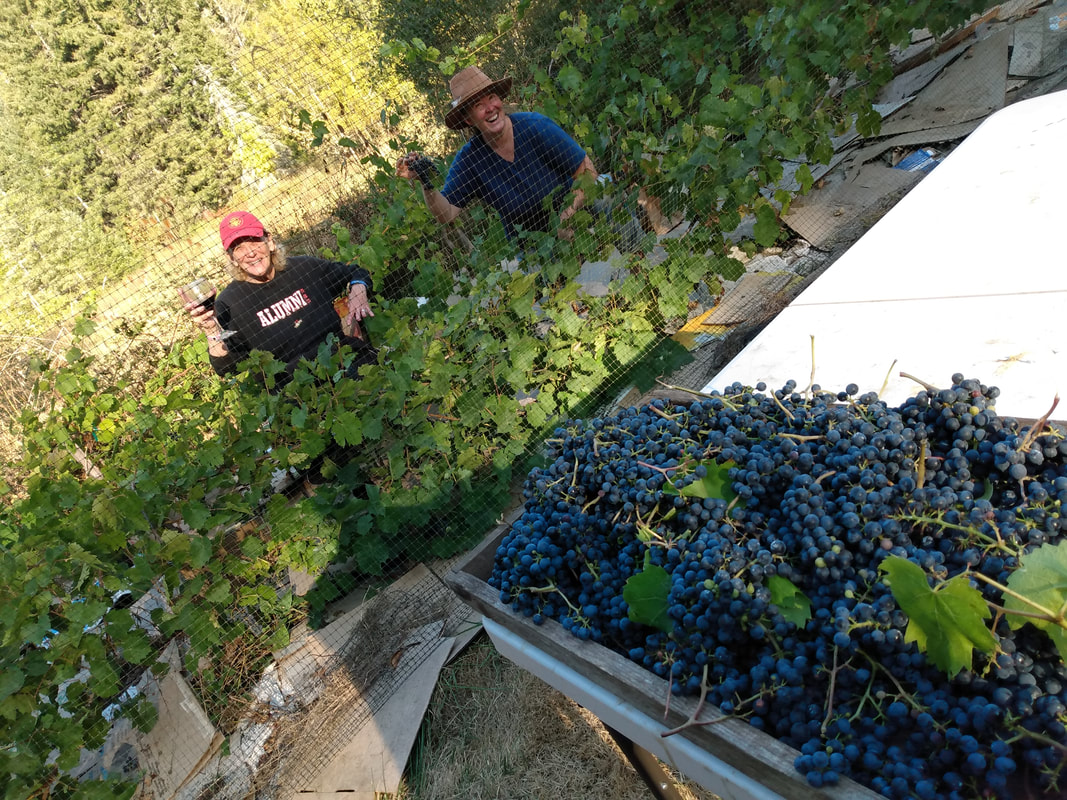
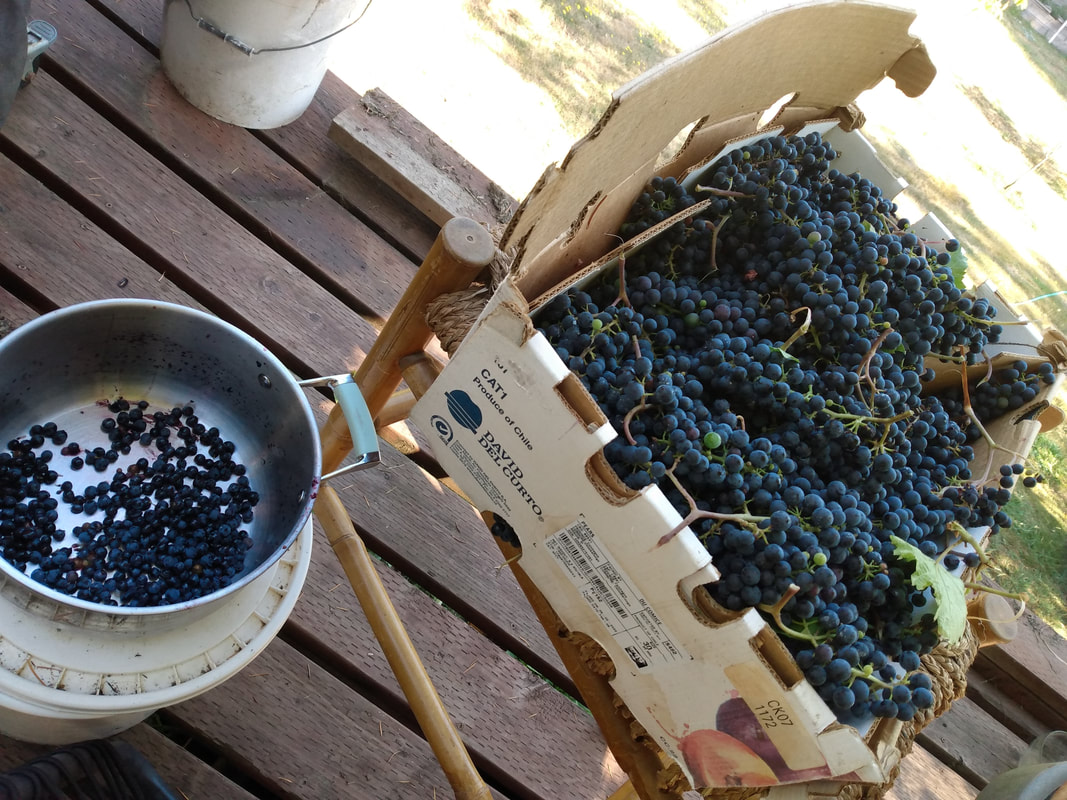
PATIENCE After ten years of waiting, the little vineyard is ready for it's first harvest. Initially I had planted eight cuttings, but had to wait in order to afford the enclosure materials. In the meantime the vines sat under 'cages' to protect them from deer. About two years ago I put up the support wires and began training the vines and trimming....and more trimming....and more trimming! You have to trim away all that foliage to increase the grape yield. The plants had gone years without watering in the summers, just a heavy mulch of cardboard and some manure. However this year the well was up and running half way thru the summer. So now the yield will increase... before that the grape harvest was too pitiful to do much with. These two elements of heavy trimming and watering enabled me to harvest my first crop of grapes in 2022. My neighbor came over and after cracking open some decent red wine we harvested it all in about 2 hours. She even stayed to de-stem the four boxes. It's been so long since I planted I forgot the vine variety. But I believe they are marguerette vines. A pinot noir hybrid made for climates like the Northwest. It can go to -36F and certainly mine lived in virtually drought conditions. Our short hot seasons with lots of moisture in the spring and fall can be hard on grapes. They are high in sugar, so even though I harvested early, they came in high on the hydrometer test. YEILD I was able to harvest four boxes of grapes for the six vines that were producing (the whole vineyard is about 60x25'. That size is a good start and not too overwhelming. I bought everything I needed for about $250.00. So I won't have much of an expense next year. After processing I only have about 4 gallons of wine- and some was spilt (typical of beginner wine making!!!). I look forward to more grapes next year. To increase my yield for the future, I just cleared a new section for more vines. 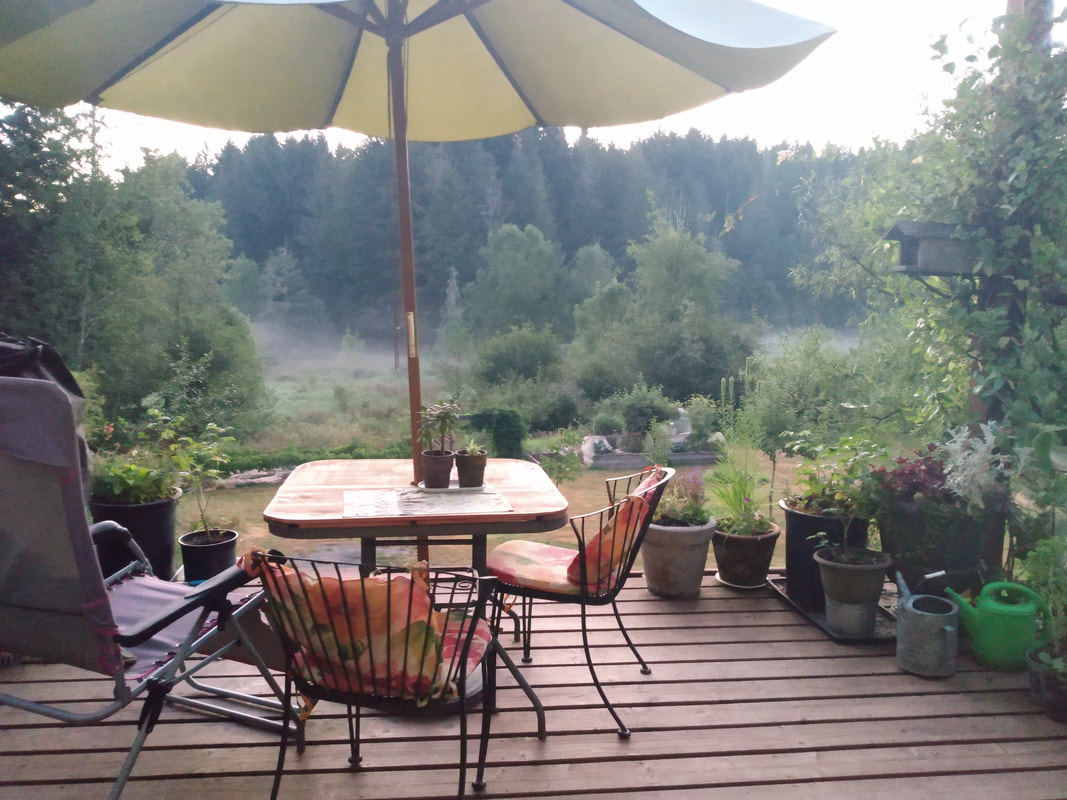 HEY! I LOVE THESE PUMPS! If you have a low flow, gravity tank, off grid setup this is the best option... https://www.rpssolarpumps.com
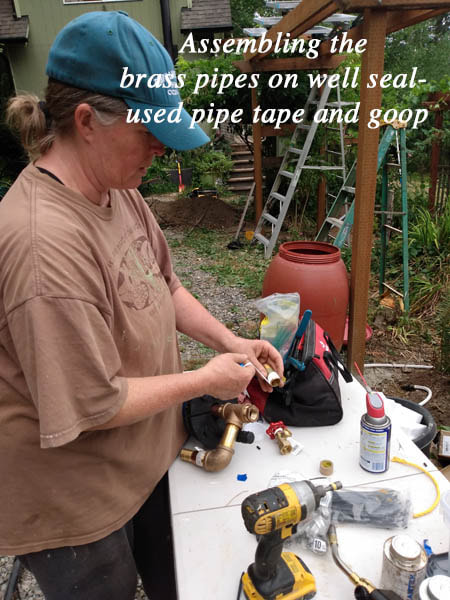
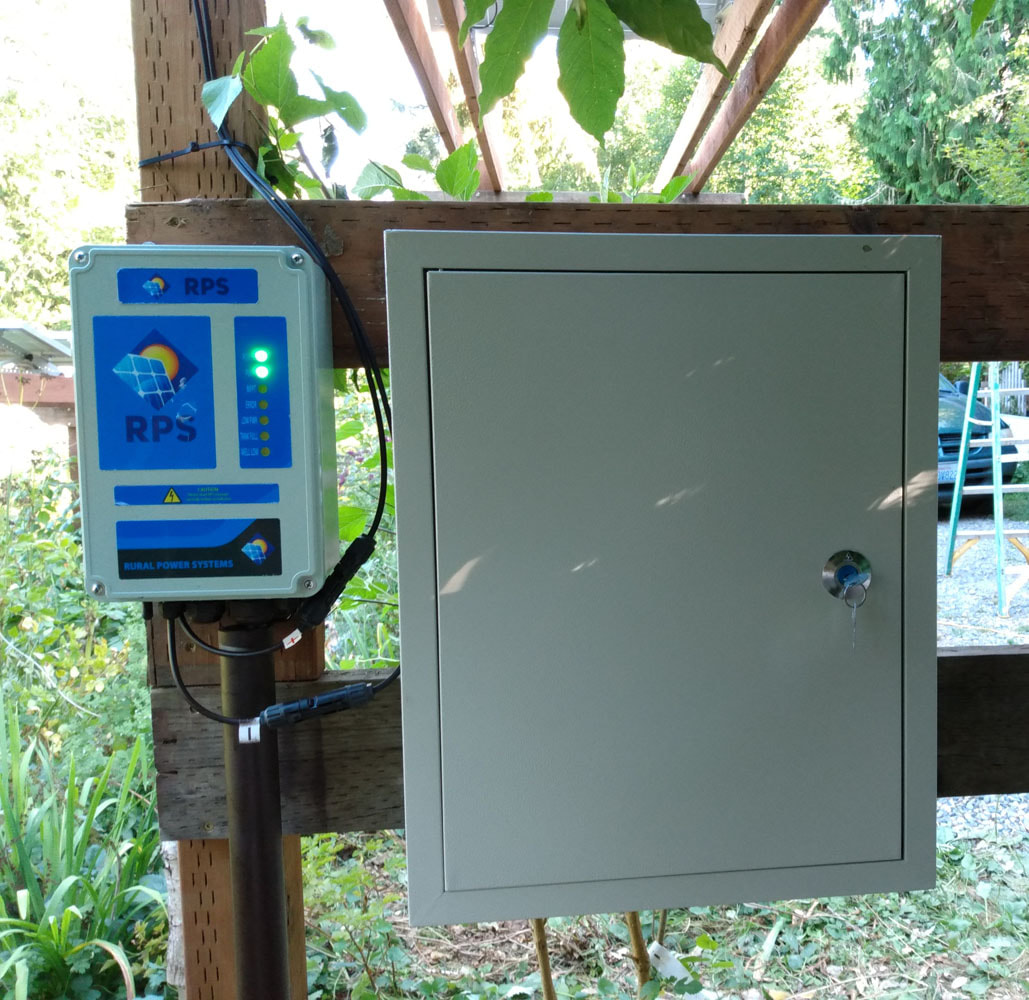
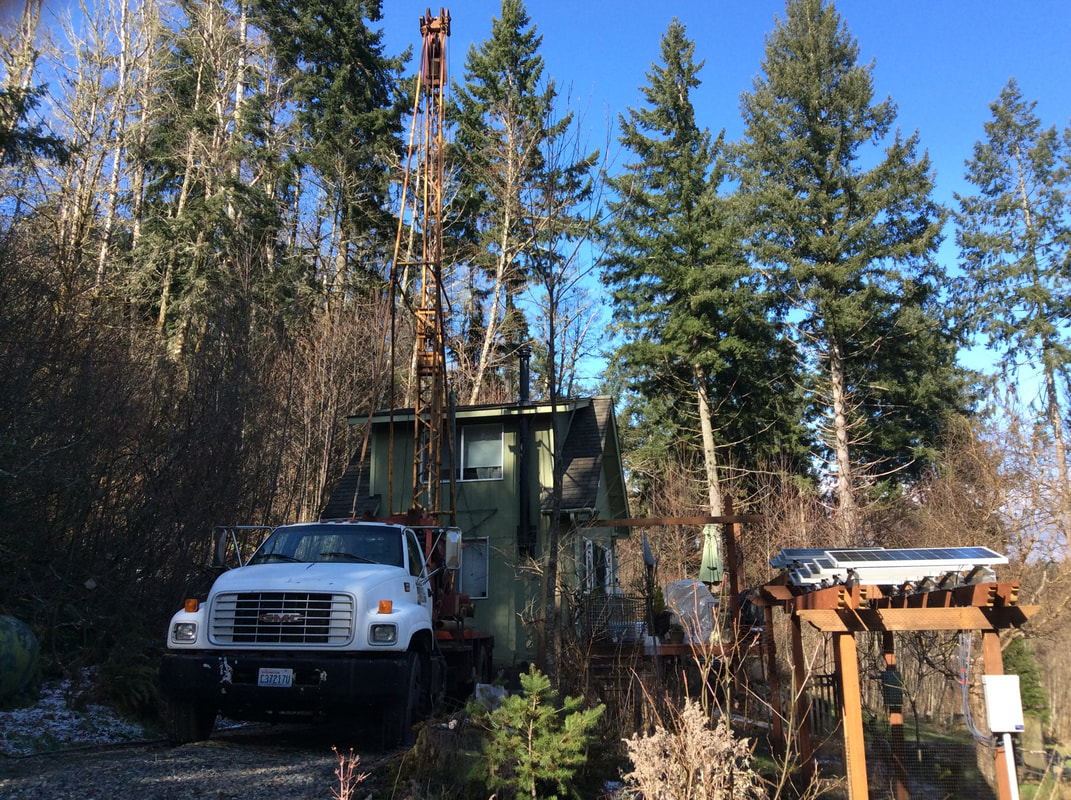
AFTER 12 YEARS of using Rain water....I installed a solar well!
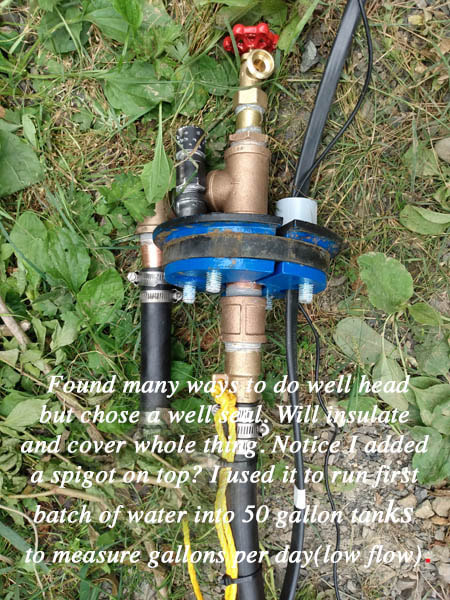
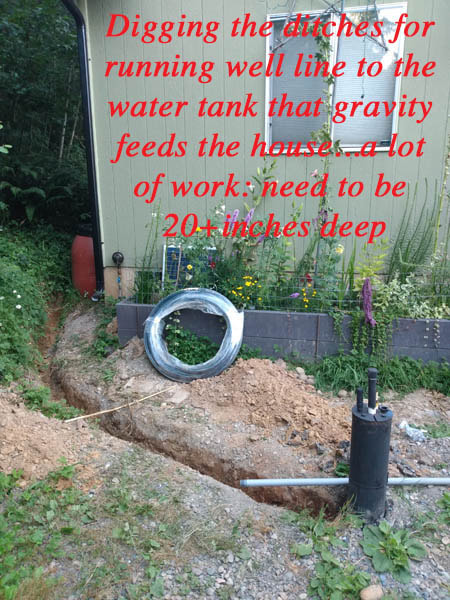
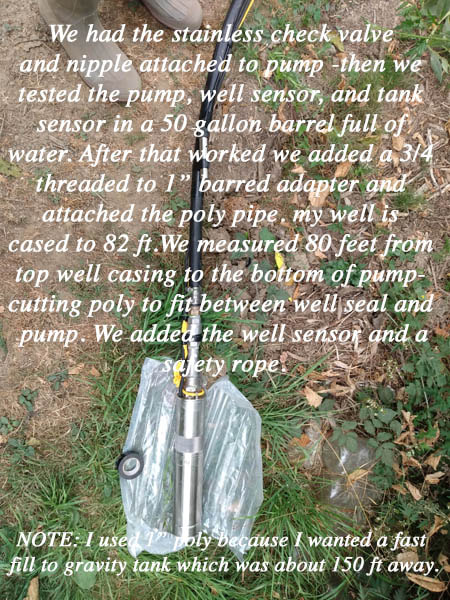
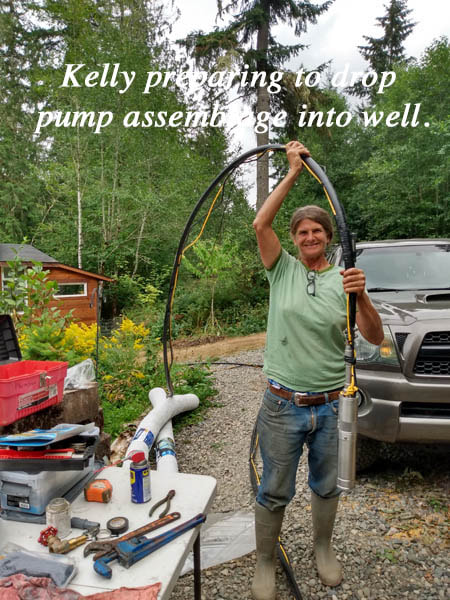
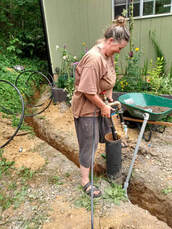
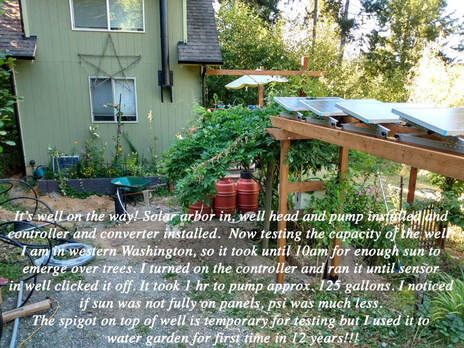
After waiting in line for months for my well to be drilled, it was done! After Terry -the well driller-left with his rig, it was time to add the pump and pipes. There was a small snag, once the well was drilled I found out it was only a low flow well....only around 125 gallons a day. In this case a solar pump is good for both low flow and a gravity fed tank. I did my research and found RPS. The RPS SOLAR PUMP KITS: are the best! I ordered the RPS400 solar panel kit without the solar panels The panels were from renology and I orderred 4 which in retrospect might have been more than needed for my 100 foot away water tank (about 80 ft away with 60 ft rise). They sat in my shed for months until I had time to build the arbors. PUTTING IT TOGETHER FIRST THE DITCHES: This week I finished about 50 feet of ditches. A 20" deep ditch (according to frost line in our county) for the water line to connect the well into the existing house supply line. Another to install the electrical conduit from well to rps controller. In addition there was a separate small ditch from a pre installed #10 wire from generator to the converter. Converter was placed next to the controller. The converter is for situaltions when you want to pump well and there is no light. It is a dc to ac box with an auto switch so in the winter if there is low light I can turn on the generator and the converter senses it and switches on the pump bypassing the solar. UPDATE: I found outlater I never needed converter in the winter, but good to have anyways... SOLAR ARBOR FOR WELL: I built another solar arbor just for the solar well. Built of pressure treated 4x4 and 2x6s, I then mounted four renology 100w 12v panels for the RPS400 Pump. After using the RPS calculator, it seemed I could have used the smaller 200 pump. But I opted for the bigger pump and four panels. In the end it wasn't necissary but I am glad to have too much rather than too little power. UPDATE: Pumps the entire 120 gallons in just one hour. SO I turn off the controller switch often since I don't use that much water and the tank storage is 1200 gallons anyhow. WELL HEAD AND PIPING: After deciding on 1" pipe not 3/4, I used brass fittings for the well seal. I used black poly pipe for the water line up. Then attached the #12 submersable electrical well wire. After some research I decided to add a faucet onto the brass T on well head to do testing and maybe water the garden directly when pumping the well. BUT have to remember to NEVER leave pump on if both water valve(to gravity tank) and faucet is turned off ! UPDATE: the faucet works great. I use it constantly and the pressure from tank at top of hill is good. I even use faucet when pumping the well and pressure is even greater. YEAR UPDATE: Well, there were some mistakes. I added a check valve just above well pump and it failed. Apparently they are supposed to go horizontally and it must be clogged with sediment?. I am digging out the water line 2 feet up from well head on way to tank. Installing a box to access and a new check valve. The ball valve I put on side of well is great! since check valve failed I can turn off this valve to prevent tank from unloading water out of well. Just have to be sure open when puming well. I dont leave solar controller on anymore just turn on manually after I open this side valve. Then I shut everything down fast after pumping so tank doesnt empty thru well seal. ALSO I need to replace the junky turn valve at top of well to a ball valve...... PUTTING IT ALTOGETHER: It took me and an electrician friend about 8 hours to assemble the 80 feet of poly pipe, the pump, well sensor, safety rope and well seal assembly (there was also a check valve on pump). We installed the controller and the converter onto the solar arbor at chest level for convenience. TESTING: Once the poly pipe was added to gravity tank and the sensor installed inside the tank it was ready to test. The next day I emptied the well of 150 gallons of water. It took about one hour. I noticed when the sun wasn't full on the panels it ran weaker, but it did rise to about 100psi at full sun. GRAVITY TANK: If your lucky enough to have the water tank feed your house from above....it can use gravity! Mine tested at about 30 psi (I use a little psi gauge I bought at ace hardware) as it is placed about 80-90 ft above my house. So its pressure is enough for faucets but just not quite good enough for little eccotemp(or the bigger marey water heater in house) to operate steadily. Thus a shurflo pump is ready for install beneath the house....luckily I placed an electrical plug under house for light. So will just plug in the shurflo after adding an manual switch (it turns on automatically when you open tap, but I like the ability to turn off pump manually too) The water system is not finished but it's close.....just need to add filters and the booster pump under house. YEAR UPDATE: I added a filter on each side of a 120v shuflo booster pump that plugs into a plug under house with a turn off switch I installed nearby. There was no way to figure this out from info on web. But it works. The filter before pump takes out a lot of sediment so I replace it every 2 months until well is less dirty. The filter after pump also needs replacement often. This might be because well is new and its taking water from 50 ft cavern. I found if I pump well once every few days it allows sediment to move down below pump more often(there is 80 feet below pump where we tried to find water originally). Just made one mistake on filter pump assembly. Used clear flexable pipe to join each section..thinking it needed to be flexable for the vibrating pump....had to replace with pex and sharbite fittings after a year. ALSO booster pump is LOUD. I attached the whole filter /booster assemble to 3/4 plywood piece and then screwed to a joist. This vibrated framing and makes it louder than necessary. SO next time I replace filters I plan to place some rubber insulting material to try to reduce vibration.  It's been too long with limited water and no real bathroom.....So bring on the 'Cowgirl Shower'!!
I haven't had money or time to finish up my house bathroom the way I want it yet. So I threw together an outside shower a few years ago. But this year the crude shower setup had to go. I replaced it with my new improved cowgirl shower. For the Cowgirl getup, I used two 6 ft pallets from a friends solar shipment, a 99$ eccotemp (1.5gpm) instant hot water tank, a 5 G propane tank, and a repurposed plastic pallet for the base. Perforations in the house siding can lead to rot so I attached all the pallets together to form a strong structure. I then attached all the other parts to the pallets, keeping the whole unit floating separate from the house. The 6ft pallets allow for a little privacy. And the view from the shower is wonderful! Its not in the pic but a field and forest are off to the left. I take showers here March through November then it gets a bit too chilly. Nearby is the 'cowgirl hot tub' which can be attached by quick release fittings to the eccotemp. I just bought a transfer pump to recirculate the cold water in the hot tub to the eccotemp (includes a rv filter). More on that project later....
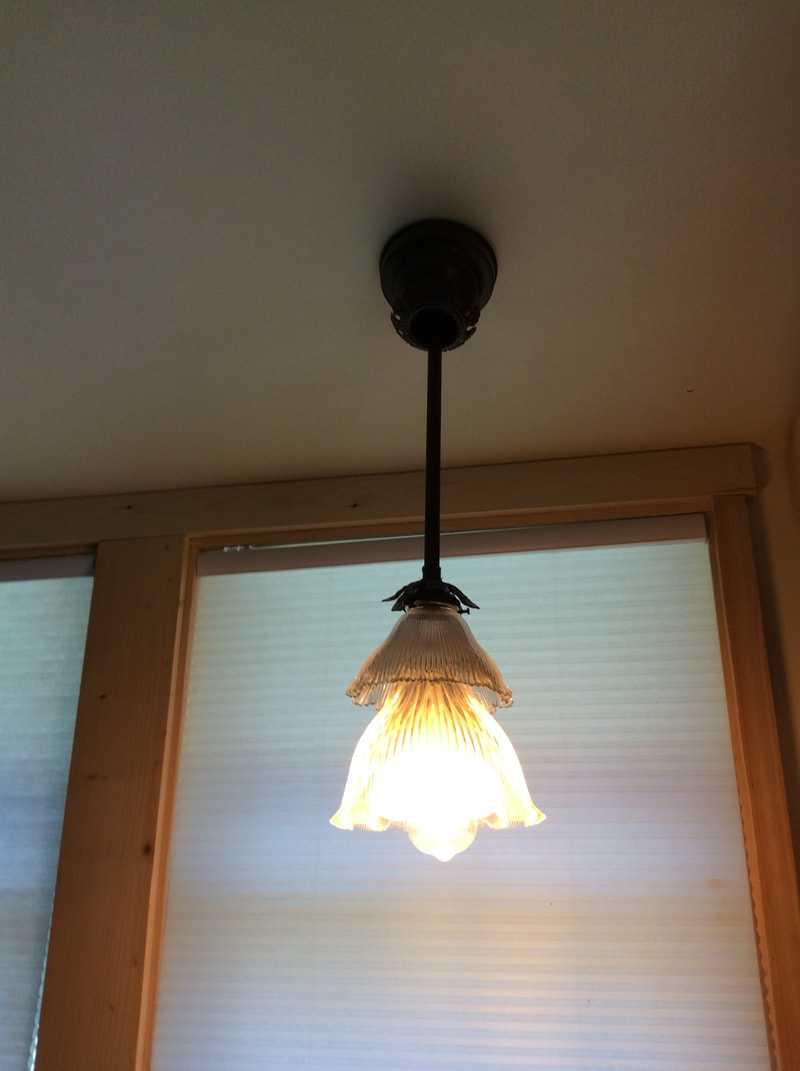
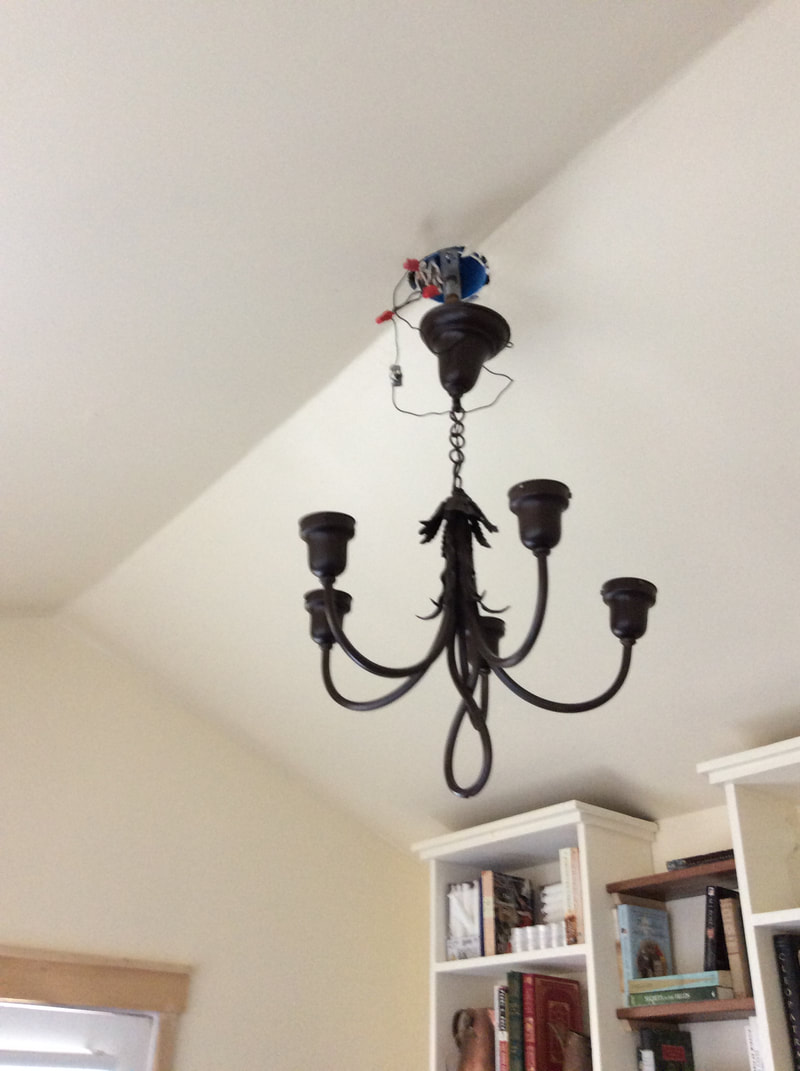
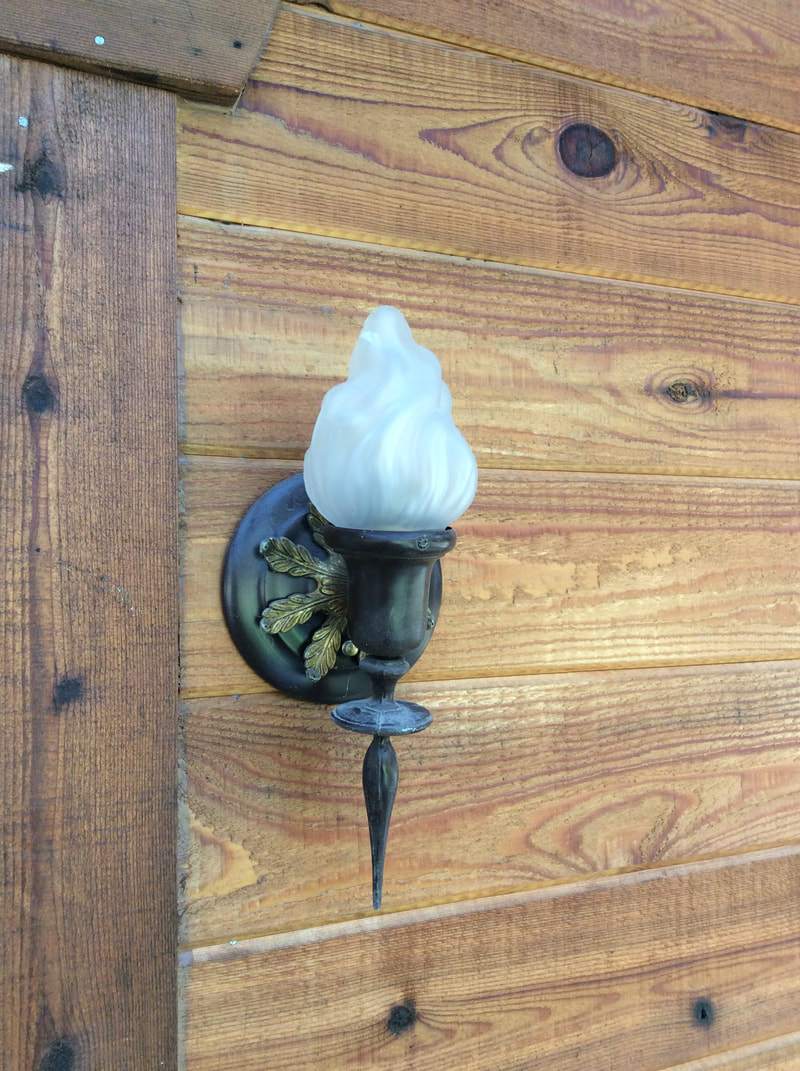
Since I was doing some unusual things already in the guest house I decided to make my own lights as well!!! In order to facilitate low energy usage, I wired up lights on separate switches in my art guest house. My thinking is that guests are usually not used to off grid power and might get forgetful about energy usage. Above are four fixtures made from lamp and light parts I assembled, spray painted and installed! the light on left has two 100 year old glass shades that resemble the cool lights in Downton Abbey. I had to braise some copper plumbing parts together to link the shades safely. The wall sconce back plate (light second to left) is probably form the 1800's and the outside torch light (far right) has a bunch of odd parts thrown together. Its not finished, but the chandelier has dozens of broken crystals I bought at an antique shop that were rewired with epoxy putty. (will post pic when done) For all the fixtures, I installed low wattage LED bulbs, mostly in the 25 to 40 w range since I was being conservative. Below is my favorite.....yes it looks full size.... but actually its a little fairy house installed in the wall!!!! I used lighting from a hobby store with a 12 v transformer. I left a panel open in the wainscoting to install a plug and accessories just for the fairy house. I made all the dozens of tiny books and furniture!..Kids adore it and will play with the fairy doors for hours. The total usage for the fairy house is about 2w. 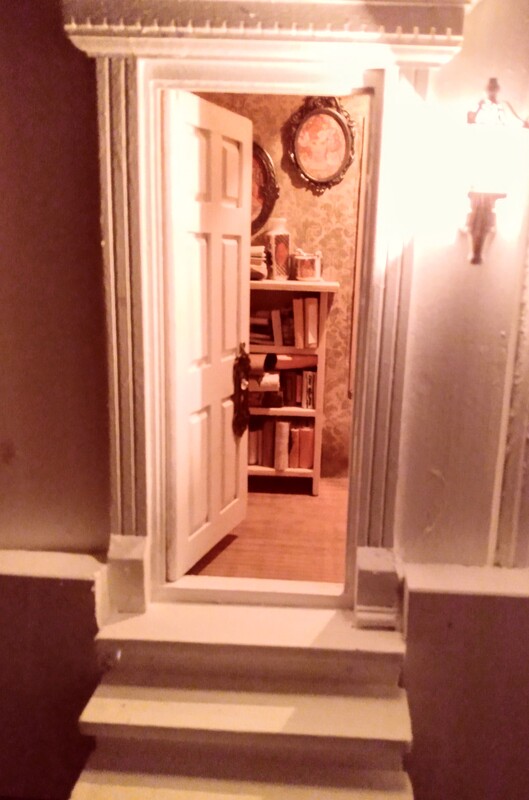
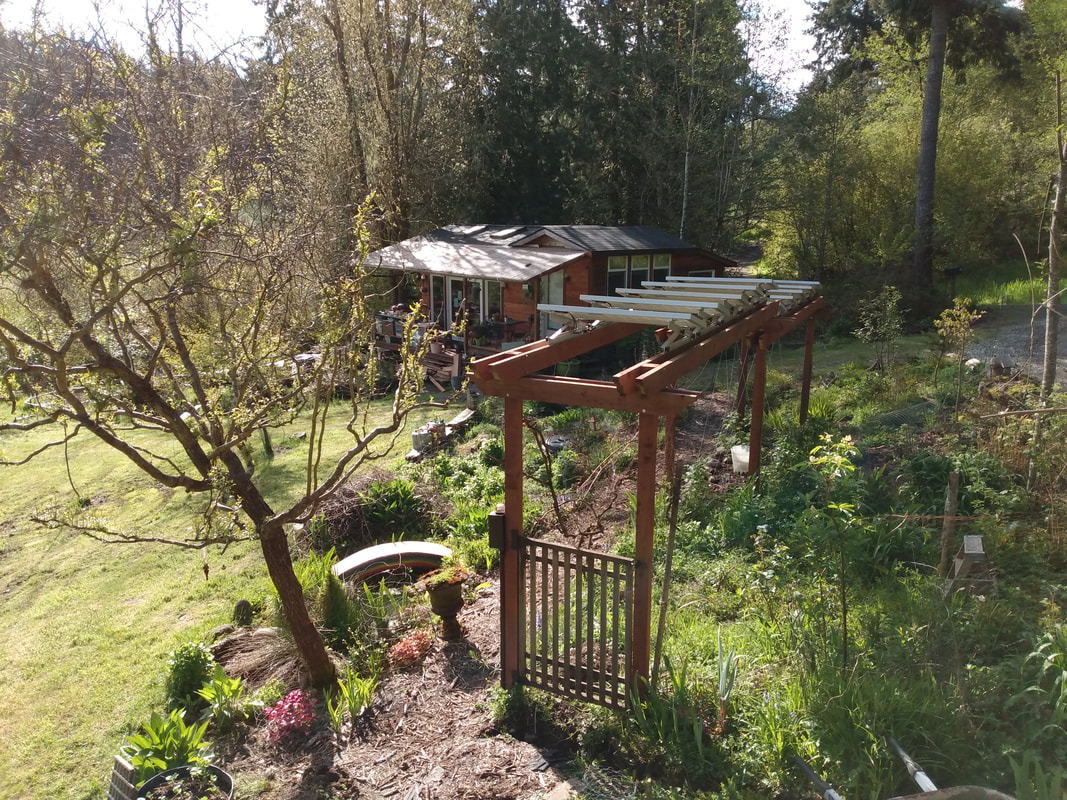
Installing my solar system has been a long project! I began Bartering years ago with a friend who is a solar installer and we finally completed the system last month.
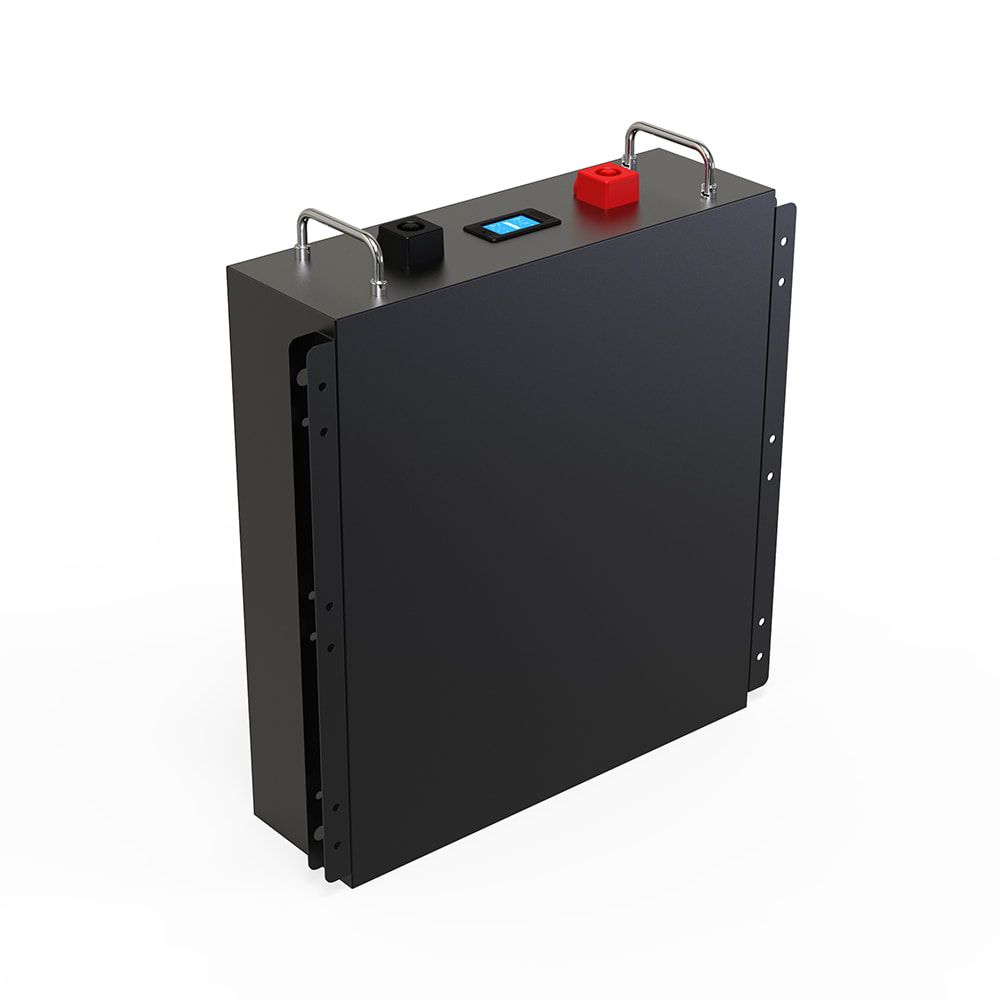
Above is the solar arbors I built last year (pic on left near the well rig). You can see it's not ideal for sun as its in shade often. The location was a compromise since the best spot was hundreds of feet away. In addition wire had become very expensive and hard to find last year. I had used recycled wire for some of the project. But in retrospect I don't think collecting wire for ten years (and then finding a few pieces not good enough) was the best choice. I would probably just buy as-I-go if I had to do over. The bulk of the equipment was bought from www.backwoodssolar.com.(BW) They designed the system for free after I send the specs for distance and what my power needs were. They provide incredible customer support, a must for a novice like me. SYSTEM: 24v-1000w of panels, 200ah battery
I had almost no experience with solar. However I have wired up three houses of my own and did some panel work. Being a novice, I still haven't figured out the programming but its getting there. Here are some details you might find interesting: MANUAL GENERATOR CHARGING: I added a sub panel at the generator: 30amp breaker for a cable and plug I recycled and made to fit into generator. This allows me to just 'plug' in the inverter when it needs charging in winter. It also allows me to run another wire from subbox/generator plug to the well. All I have to switch between the two circuits is to toggle the off and ons (the Honda generator also has a switch at plug site which is turned off and on loads to protect demagnetizing at generator). You can attach a remote wire switch to this honda model but the switch kit was over 400$. DESIGNATED GENERATOR connect ADDED: I ran a wire from sub-box to a small panel near house to connect generator and my well direct for manual charging. Though I planned to use the gene. to pump the well it wasnt necissary in the end. When we drilled it was only a low flow (100g per day) so I bought a 400 DC solar kit from RPS Pumps. The oversized generator will be a back up in winter to pump well when the new DC well designated system is in. THREE BUILDINGS ON SYSTEM: My energy needs are small so the system is small.....1000w of panels, 200ah of battery. It can't handle all three building at once running a lot of devices and lights. But so far I power my art studio, guest house and cabin with the system and it works great! UPDATE:In the summer there is endless power, however I run my generator to charge battery about every 3 days from october to march. INVERTER TOO BIG?? I am still trying to figure things out and can only get so much help from others. I think the inverter is big and seems to use 22w of energy(?). My neighbor claims its better to have smaller inverters. But I do love the Victron durability. I was told by backwoods that it has an eco mode to program so will do that asap. DAILY USE: My daily use seems to average 90 watts. This amount is used by the following: mini fridge, inverter draw, a few lights carefully used, and movies at night. I use a lot of power tools right now so a few days a week I use more energy....But It is saving me $ on gasoline! I find myself charging every four or five days in April.... and it only needs an hour to charge system. The huge 7000w genie is underused as the inverter only uses about 1500w. Luckily the Honda has a gas saving inverter mode. But a 3000w Honda would have been better for this system. So far: WITH low use...(1000w, 200ah system) it takes maybe $40 in gas a month. With ethanol free gas getting more pricey, I hope the summer brings more sun and saving. **MISTAKES: -big generator might be overkill, though its mentioned on internet to use double your inverter charger #(ex: 3000 w inv/ch then use a 6000 w generator) I found this unecissary and other off grid neighbors who use oversized generators waste a lot of $. -solar panels maybe should have been in higher light area (but wire cost would have been high) -saving old wire for jobn(didn't save that much and wasn't always right wire) -using solar charger from a kit I had leftover didnt make me comfortable so ended up buying a victrom model enabling me to double panels down the rd.
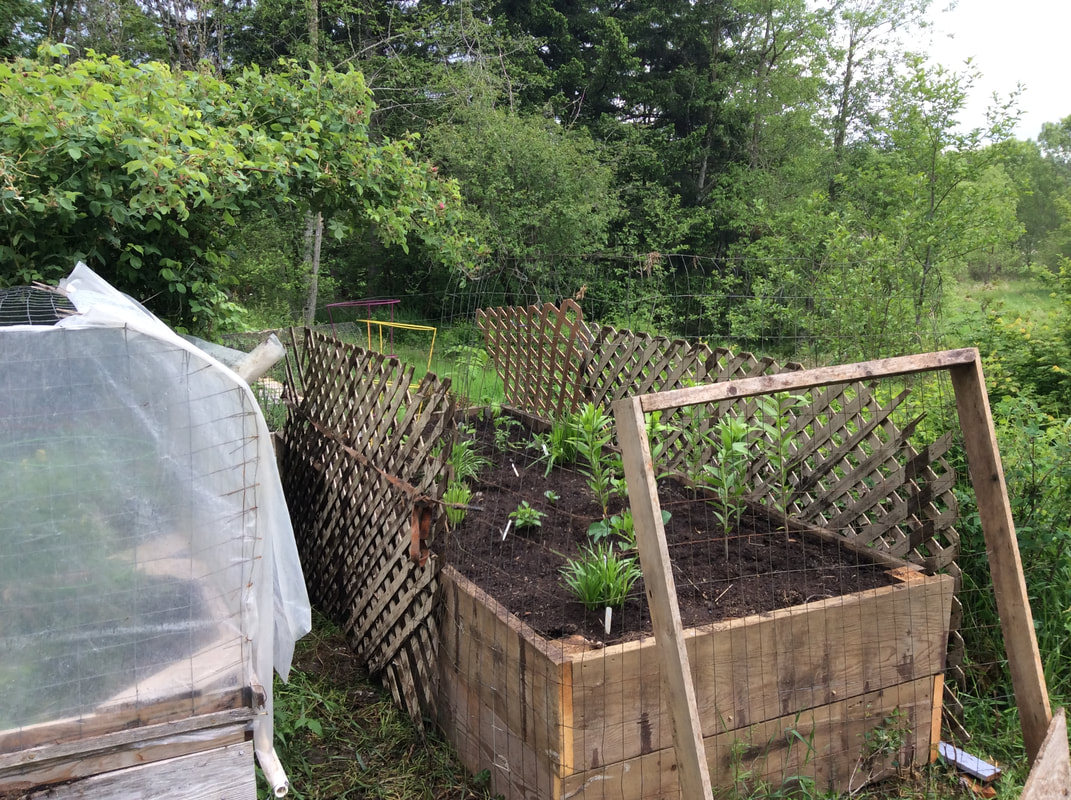
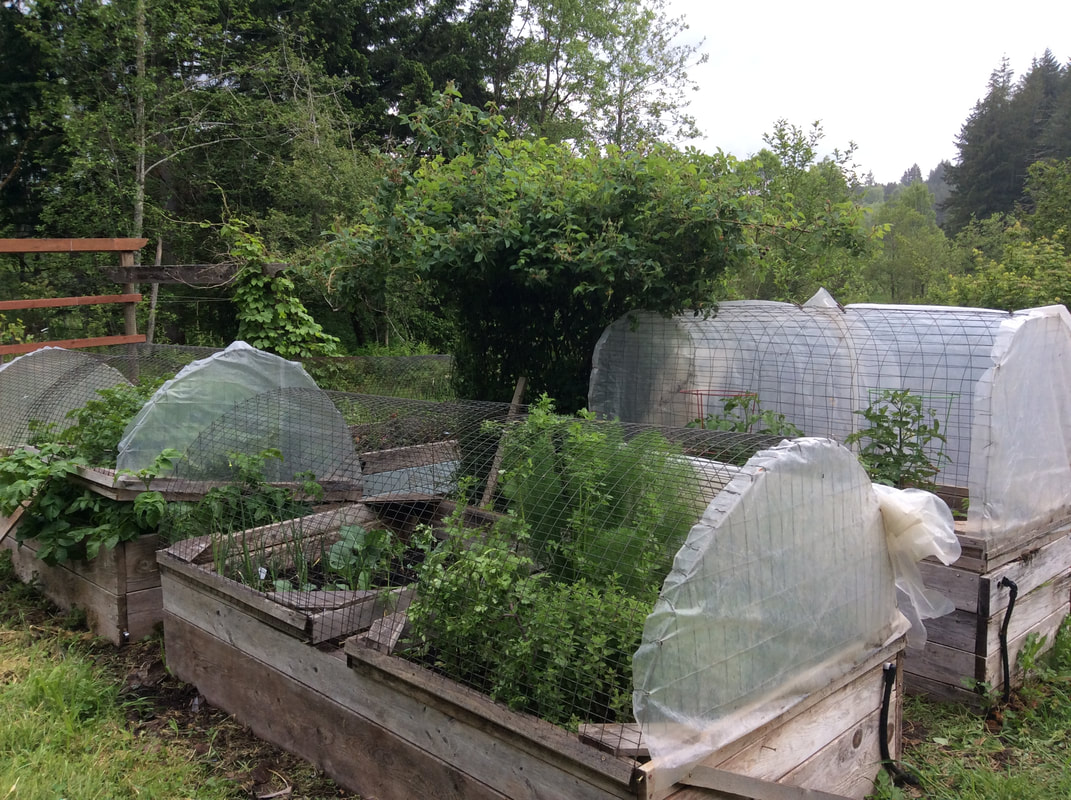
THEY aren't pretty but they were free.... And they are deer proof and extend our PNW food growing season.
THE BOXES: For years I collected wood no one wanted. In 2020 and 2021 I used the entire pile to make 8 planter boxes. Though they are not pretty they work well. The bottoms are mostly 24" tall, and they are 4x8. I added 2x4s and scrap 4x4 to the corners and centers to secure the boards to. Some are lined with weed blocker fabric to see if they extend the life of the wood. THE GREENHOUSE TOPS: Using scrap cedar I built the tops frames and added precut wire fencing to make deer proof domes. I used reclaimed greenhouse plastic stripped off commercial greenhouses from a friend. They roll up and clip to the cage tops in the early spring and fall- extending the season by a few months. TALL TOPS: Some of the boxes only have side pieces to protect from deer so one can grow tall crops like tomatoes and herbs. THE HINGES: I even made funky hinges from bent rebar bits and plastic pipe I had around. But this was clumsy so eventually I just bought galvanized hinges. GROW OVER WINTER: Last year I left stuff growing in one closed off section and it survived until summer! giving me a head start on usually annual herbs that die off like cilantro, Italian oregano and fennel. USING THEM ALL: I made 8 4x8 boxes which seemed excessive, especially when I bought over ten yards to fill them. That took a long time!! But I found that I use all the boxes even though I am feeding only myself and give a little to friends. It makes it easier to rotate crops and leave veggies to go to seed collection.
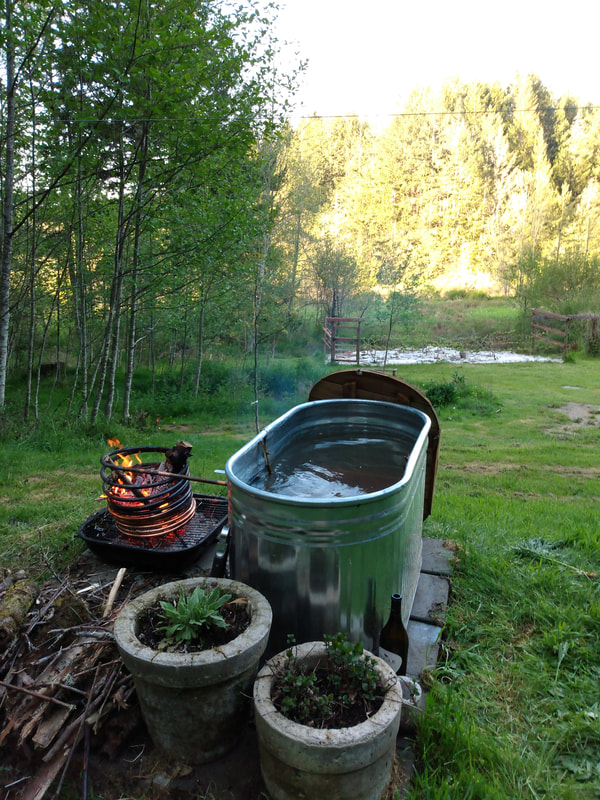
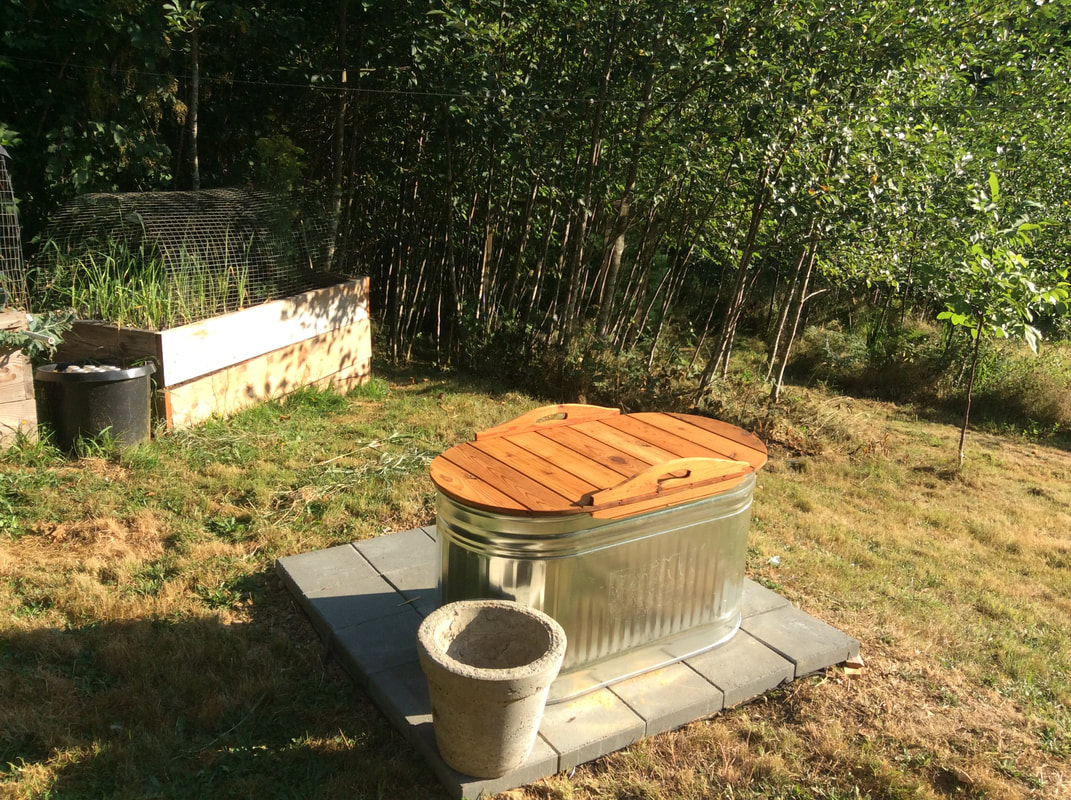
OFF-GRID HOT TUB How great huh????A HOT TUB after a long day in the art studio....and it cost about $400. While waiting for my well to go in, I decided to prep the off grid hot tub. For about 100$ I bought the water trough, $40 for concrete pavers, and used scrap cedar siding for the lid and seat. The lid was then sealed with outdoor sealant to prevent warping. The inside has a cedar seat with curved back. But I ended up taking it out often because I could get more submerged without a seat. Above right is the Nomad heat exchanger I was planning to use..... UPDATE: Nomad never returned my calls when I went to order so I switched to a 2 system option: 1. MADE a HEAT EXCHANGER MYSELF: I bought two rolls of 3/4" copper tubing($200) braised fittings on ends and inserted in tank fittings -all bought at home depot.** 2. BACK UP HEATER: a propane eccotemp + pump + filter. This change added about 300$ to the project. One needs a small inexpensive propane on demand heater like eccotemp or Marey. Then you need a 5 gallon propane tank, a small booster pump (mine plugs into electrical plug) then be sure to add an inline filter. So a pipe from hot tub leads to filter, then pump, then heater, and back to hot tub. I manually turn things off and on at this point. The tub water gets hot enough I turn it off. (will post pics soon) Finally a year later I got the systems going. Here is a picture of the heat exchanger at work! Tubing might be too narrow and I added ball valves** at juncture to tank fittings which was probably a bad idea, since both things limited the syphon flow of water through tube. It rattles and shakes a little making an obnoxious noise so will remove valves and try that way. WORKED GREAT! It took 2 hours of heating and it was ready! I love it. ADDING PROPANE if you live off grid it's likely you use propane. It's a fossil fuel and I suspect it will eventually be phased out. I just added a 500 gallon tank after placing the gas lines myself with help from my father (that saved a lot) If I had bought my tank, supplies and propane fill a year ago or more I would have spent a lot less. It was about $4500 for everything! The moment that tank went in I was planning its camo job!!! Using green and brown paints I had around...I used spray cans to add a few layers, and then cut ferns and branches with leaves to create the foliage effects. Working fast and loose, it only took 30 minutes to do. And it is so invisible that friends walk by without noticing!!! well almost.... The best thing about it is that now I have steady heat for the house AND the studio (almost more important). (UPDATE: I only fill up once a year! Because I only have heaters and a cookstove attached, and due to my conservative heater usage I spend about 500-900$ a year. 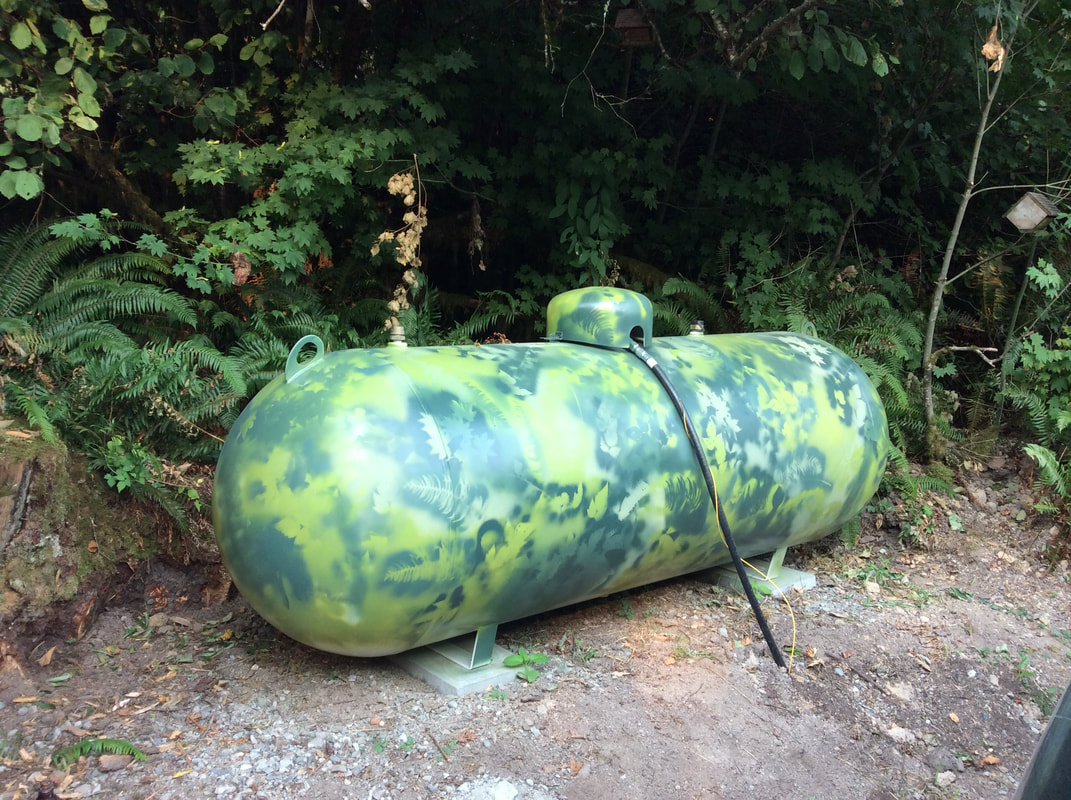 |
AuthorHi! I am an artist and a carpenter living in the woods of Washington! This is my off grid story. Archives
April 2024
CategoriesAll photos and images on www.loralin.com
belong solely to the artist. Copyright 2008-2023, Loralin Toney |


 RSS Feed